Category Archives: How to…

Pumpkin cheese-cake, with low carb version

Fresh pumpkin cheesecake

Crust

1/3 cup sugar (splenda if making low carb version)

1/3 cup butter, melted

1 1/4 cup flour (replace regular flour with soy flour if making low carb version)

1 egg

1 tsp cinnamon

Mix together and press into spring-form pan. Bake at 450 for 5 mins. Remove and cool.

Cheese-cake filling

3 – 8 ounce packages cream cheese, softened

1/2 cup sour cream

2/3 cup sugar (splenda if making low carb version)

2 eggs

2 cups fresh pumpkin, steamed and blended

1 teaspoon cinnamon

1/2 teaspoon nutmeg

Beat cream cheese, sour cream and sugar together well. Add pumpkin and mix until smooth. Then add eggs one at a time, beating after each addition. Mix in remaining ingredients. Pour over crust Bake 350ºF for 1 hour or until firm.

Chill and garnish with whipping cream. Sprinkle a bit of nutmeg or cinnamon on the whipped cream if desired.

NOTE: for true low carb version, omit the crust all together. Spray the bottom of the pan with non-stick spray.

4 Comments

Filed under Desserts and sweets, Eggs, How to..., Low carb foods, Recipes, Uncategorized

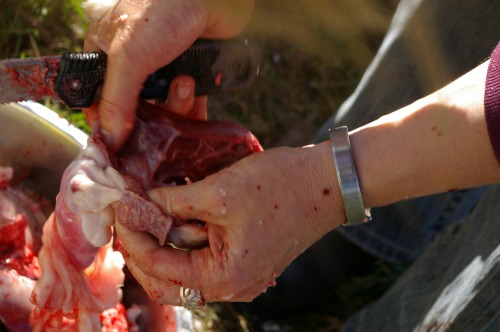
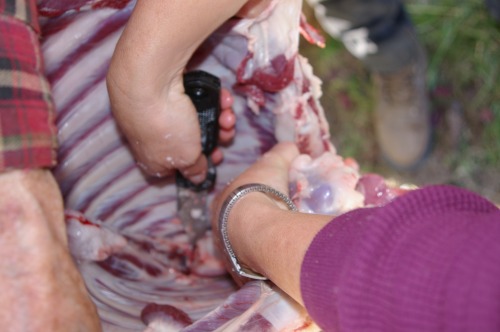
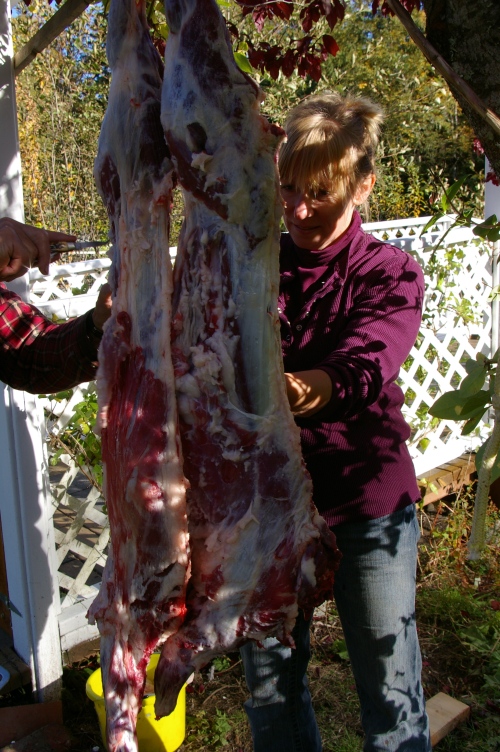
How to field dress a moose

Warning: Graphic photo documentary of the moose butchering process

One of my great life-skills mentors, Clarence, and me with my downed moose.

The moose is the largest extant species in the deer family. On average, an adult moose stands 1.8–2.1 m (6–7 ft) high at the shoulder. Males weigh 380–720 kg (850–1580 pounds) and females weigh 270–360 kg (600–800  pounds). Typically,  the antlers of a mature specimen are between 1.2 m (3.9 ft) and 1.5 m (4.9 ft). Behind only the  bison, the Moose is the second largest land animal in both North America and Europe (Wikipedia).

In light of the above statistics, it is not surprising that it is once the hunter’s moose is ‘on the ground’ that the real work begins! Processing 1000 pounds of animal (give or take a couple hundred pounds!) is not for the faint-hearted.

When my brother heard I was going moose hunting, he was quick to advise me that the guys he works with, who also hunt, said I should buy a ‘Dewalt Cordless Sawsall’ in order to make the butchering process easier. However, I knew that Clarence and David would view such a tool as an unnecessary frivolity, and that they would likely teach me how to do this with minimal equipment! As my friend who knows these men well confirmed, “You couldn’t find better teachers, because they will not only teach you amazing bush skills but they’ll also teach you to be tough.” Part of the requisite ‘being tough’ is doing without a lot of luxuries.

Besides Dave’s favourite ‘never-leave-home-without-one (or two)’ Gerber Exchange-a-blade saw, nothing more than a pocket knife and 13 pillow cases are required to fully dress out and process a moose in the field.

Step one: Remove the hide from the moose.


Start just above the tail, making sure to cut through the skin but not into the layer of sub-cutaneous fat.

Start skinning just above the tail of the moose and all the way up the back to the head between the ears. Once you have the skin off the exposed side of the animal, it is time to pull it over on to the other side. Repeat the process of skinning on the other side until you have the whole ‘cape’ removed.

Step two: Secure the moose by tying it to something steady.

Roll the moose on to his back so his legs are in the air, and tie the two front legs off  with your parachute cord (see hunting lesson one: the possibles bag) to something solid. In our case, we had one leg tied off to the quad bike and another to a small, twiggy bush. Because this is a big maneuver, I was fully involved and could not take a photo!

Step three: Cut the trachea high in the throat.


Dave cutting through the throat meat to remove the trachea. Note the parachute cord tied to front legs in background.

Cut through the throat muscle to get to the trachea and esophagus. Cut through both tubes to free them from the moose. They will be pulled out, along with the other gut contents, through the belly at a later stage in the process.

Step four: Retain proof of the sex.

Proof of sex: exposed penis hanging down with each testicle laying on belly.

Be careful not to lose the penis or testicles until you get the moose home, because ‘proof of sex’ is required by law if you are checked by the Conservation Officer. Cut the hair from the sex glands and expose them, laying one testicle to each hind quarter.

Step five: Open the belly.

Clarence demonstrating how to cut through the moose's belly.

Carefully cut through the belly skin, being sure not to cut any of the gut contents. Begin at the pelvis and work your way up to the rib cage. It is particularly important not to cut through the intestines. Note the tiny pocket knife in Clarence’s hand; it is the only knife I’ve ever seen him use. This is what he butchers all his chickens and turkeys with as well!

84 year old Clarence still going hard and working his way up the belly cut.

Step six: Cut through the breast bone to open up the chest cavity.

Dave hand sawing his way through the breast plate of my moose.

This is the first moment you need to get out your Gerber Exchange-a-blade-saw. Cut through the breast bone, being careful not to damage the guts inside the chest wall. Once the breast plate is completely opened, finish cutting through the belly, meeting the chest wall cut.

Step seven: Haul out the guts.

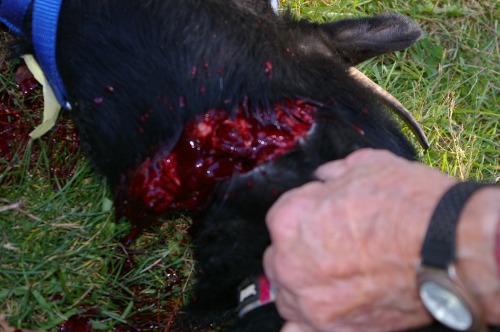
My right index finger is in the hole where my bullet when through the moose's lungs.

Taking a good grip on the trachea (I cut a small hole in the trachea just large enough to put my fingers in and get a better grip on it), begin to pull the guts out of the moose away from the chest towards the belly. You will have to cut through the diaphragm in order to get the lungs and heart through into the belly cavity. Note the blood on the side of my cheek. Put there by Dave to indicate the first part of my initiation into ‘the wolf pack’; the rest of the initiation required me to eat the some of the heart and liver!


Hauling out the guts is a team effort!

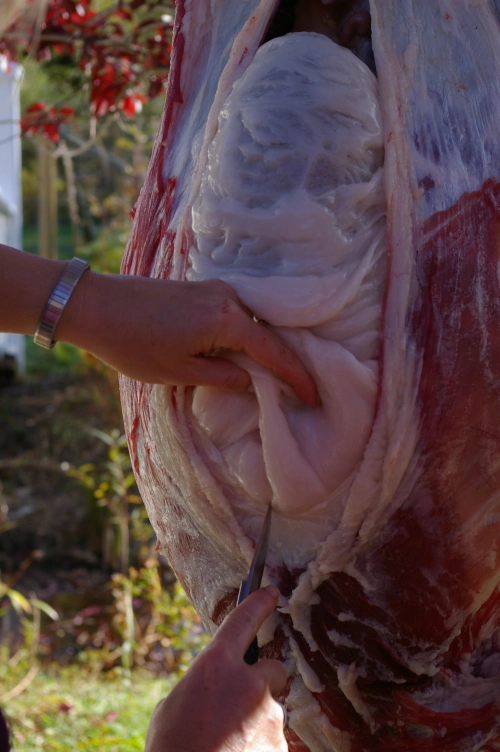
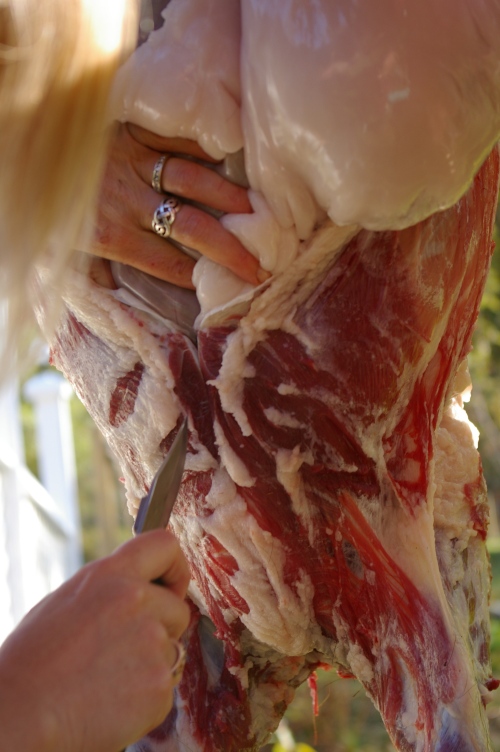
Clarence is cutting through the diaphragm so I can get the lungs, heart and trachea through into the belly cavity. Once complete, we then haul out all the contents from the body onto the snow.

Step eight: Cut through the pelvis and anus.


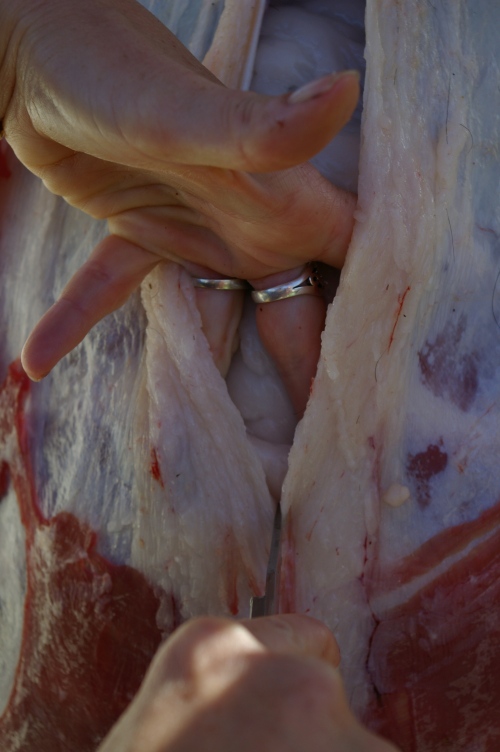
Dave beginning the pelvis cut for me.

Be careful not to cut through any intestine when you cut through the pelvis bone and around the anus.


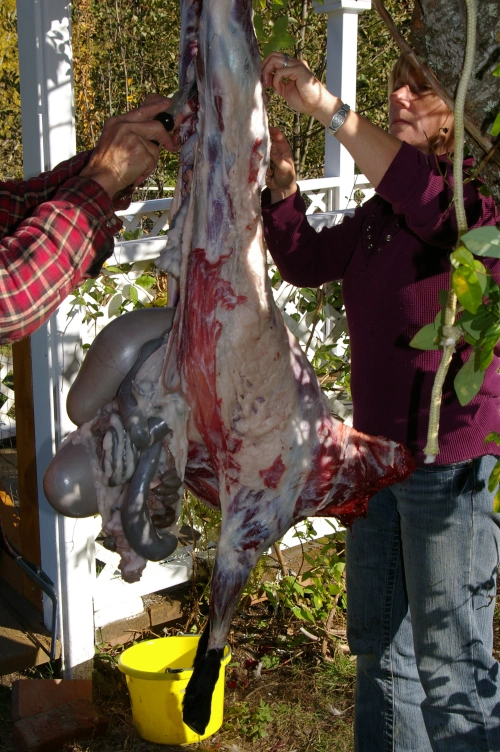
Gutted moose held open for quick cooling.

Because it was nearing dark at this stage, we took the heart, liver and tenderloins back to camp, and I had the first taste of my moose that very night!


21 Comments

Filed under Animal issues, Butchering, Educational, Gathering from the wild, How to..., Hunting, Moose, Wild game

Slow roast goat leg

Cooking for Cullen

I’m hosting our National Member of Parliament for dinner tonight, Nathan Cullen. Consequently, I had to find something to cook! Having recently butchered one of my goats (and checked with his reps that he doesn’t have any food allergies or dislikes, I decided to try finding an interesting recipe for goat leg. This recipe is inspired by Chocolate and Zucchini which calls for a lamb shoulder and I’ve made some adjustments to suit my taste and the goat leg.

For the seasoning paste:

1 bushy sprig of fresh rosemary (you can substitute 1 tablespoon dried rosemary, but fresh really is preferable)

lemon (organic if possible)

50 gm filets of anchovies packed in olive oil, drained (if you don’t have anchovies, then use a combination of green and/or black olives!)

4 cloves garlic, peeled

2 teaspoons whole mustard seeds

A fresh ground black pepper to taste, or several good turns of the mill

2 teaspoons balsamic vinegar

3 teaspoons olive oil

For the meat:

2.2 kg (5 pounds) bone-in Goat Leg

8 small ripe tomatoes, about 650g (1 1/3 pounds)

8 small onions, quartered

4 cloves garlic,

Serves 6 to 8.

Pluck the needles of rosemary and discard the tough central stem (you can leave it to dry and use it as a skewer on a later occasion). Peel the zest of the lemon using a zester or a simple vegetable peeler (save the naked lemon for another use).

Using a mortar and pestle, combine the rosemary, lemon zest, anchovies, peeled garlic, mustard seeds, pepper, vinegar, and oil. Grind until the mixture turns into a coarse paste.

Place the leg of goat in a baking dish large enough to accommodate it, and rub in the seasoning paste, taking care to spread it well, and on all sides. (Clean your hands meticulously before and after the rubbing.) Cover with plastic wrap and place in the fridge for at least 1 hour, preferably 3 or 4.

Remove the meat from the refrigerator 30 minutes before cooking to bring it back to room temperature. Preheat the oven to 220°C (430°F). Remove the plastic wrap from the baking dish. Add the unpeeled garlic cloves and the tomatoes, cored and halved, slipping them under and around the meat, wherever you can and place the quartered onions all around the goat leg and drizzle with olive oil.

Place the dish in the oven to cook for 30 minutes. Lower the heat to 130°C (270°F) and cook for another 2 1/2 hours, basting and flipping the meat every 30 minutes or so. Cover with a sheet of foil if it seems to brown too quickly.

Let rest on the counter under a sheet of foil for 5 minutes. Carve the meat table-side and serve. (The leftovers are even better the next day.)

Goes well with greek style roasted new potatoes or brown basmatti rice.

18 Comments

Filed under Goats, How to..., Low carb foods, Meat and game cookery, Recipes

City mouse acquires country mouse skills

My first attempts at knowledge transfer

Tami and I pick out the first roosters to be dispatched.

Tami and I pick out the first roosters to be dispatched.

City mouse met country mouse recently over a chicken carcass here at Howling Duck Ranch. I have a city friend who, inspired by my posts about slaughtering turkeys and chickens humanely, was keen to come up for a visit and learn something about taking control of his own food source. He brought his four year old daughter Meah along, and his partner Tami. As we discussed the planned cull, Virgil recalled the scene in Lonesome Dove (the great TV western which I recommend to all my friends and visitors) where Clara’s two girls announce the arrival of visitors to their lonely ranch and blithely ask, ‘Can I kill a pullet for dinner, mama?’ As he relayed the story to me he concluded, “If a ten year old little girl can be excited by it, a 30 yr old man oughta be able to do it, too!”

The day of the slaughter of my meat birds dawned and I got up early, as you have to when there’s so much preparing before and cleaning up after. It was after I’d got the gas heating the water barrel, and were about to select our first two roosters, that Virgil and Tami emerged warily from the house. Virgil walked over with confidence but Tami approached the turkey barn verandah with apparent hesitance. I checked in with them that they really wanted to do this and they both nodded. Tami and I went first to the barn to pick out the first victims. I showed her how to catch a chicken which she mastered adeptly.

Once back outside, I promptly demonstrated the technique of knocking out the bird by whacking its head against something hard, in my case it is a saw-horse, to render the bird unconscious before slitting the jugular. It makes for a more humane dispatch.

Virgil's first attempts at using the chicken plucker.

Virgil's first attempts at using the chicken plucker.

Virgil was keen to try, and quickly mastered the art of swinging the bird overhead but controlling the wings and legs so as to not break any bones unnecessarily as you do this. He was an equally quick student of slitting the jugular and showed no revulsion at doing so. At the sight of running blood Tami excused herself. I later learned that she went back to the house and tried to keep from fainting; a confirmed city slicker would have stayed there, but—to her credit—she overcame her squeamishness and reappeared to help us. “That’s why my tatoo says ‘Mind over matter'” she explained when I told her how impressed with her determination I was.

Showing Tami how to gut and dress the chickens.

Showing Tami how to gut and dress the chickens. The scalder was not hot enough on the first bird so we ended up having to do a bit more hand plucking before gutting the bird.

Meah, Virgil’s not-quite-four-year-old daughter, wisely raised with no illusions or squeamishness about where her food really comes from, was simply thrilled that she was looking at tonight’s dinner. She watched keenly as I demonstrated how to scald, feather-pluck, and gut and dress the birds. She prattled on asking her dad if we were going to eat the chickens for dinner. It was all the more disappointing for little Meah when we realized that by the time the bird was roasted that night, she should be asleep. We promised her cold cuts the next day as Virgil put her to bed.

While dressing out the chickens, Tami showed her knowledge of veterinary assistant work by examining the organs and explaining how they looked healthy and why. In one instance, she was able to show me lesions on the gizzard, possibly due to the bird having eaten something sharp (I have found a nail inside the crop of a turkey).

That evening, over glasses of wine, we honoured our meal, commented on its delicate flavour, and analysed the day’s emotions. Both our visitors felt ready, both in the knowledge and emotions departments, to slaughter their own birds in future.

9 Comments

Filed under Butchering, Chickens, Educational, How to...

Bloodless castration: an atypical birthday celebration

On October 11th, my birthday, my goat kids turned 12 weeks old. This was as old as I could safely let them get with in-tact testicles and not run the risk of them impregnating their mothers or sister; or at least that’s what my research tells me! So, happy birthday to me, I spent the morning castrating my goats.

Some advise separating the bucks from the does at 3 months old, emasculate at 4 months old, and then butcher at 5 months of age. However, I do not have the facility to separate the bucks from the does so I decided to play it safe and castrate them at 12 weeks old. This way, I know for certain that they will not breed with my does.

It was a miserable process, likely worse for me than the kids. Yes, they cried out when the clamp was on–and as they did I nearly cried myself–but relief seemed immediate the second the clamp was released. The look on their faces frightened me because I thought they were going into shock. If the pitiful wails weren’t enough to tear my heartstrings, looking into their eyes when they stopped crying and withdrew deeply into their minds–mentally checking out–nearly did me in. However, I’m happy to report that within a minute or two of letting them go, each kid was back at the feeder and frolicking around the paddock in search of fodder. They did ‘walk like cowboys’ for a few hours that first day but by the evening they looked as good as new and had even forgiven me for doing it, running over and snuggling with me when I went to check on them that night.

Note: I have read a lot of different articles on this subject and bought the “Veterinary Guide for Animal Owners” by C. E. Spaulding, DVM and Jackie Clay, before attempting this procedure.

Step 1: Some advise to wash the testicles since the emasculator, in my case the Ritchey Nipper (or Side Crusher as they are called at Premier One where I bought mine) can break the skin. In my case, I did not wash the testicles beforehand and I did not have any broken skin.

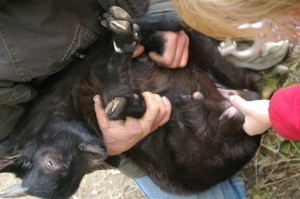
Step 2: Have someone hold the goat by the hind feet with the goat laying back into their lap.

The easiest method of holding the goat kid in preparation for castration.

The easiest method of holding the goat kid in preparation for castration.

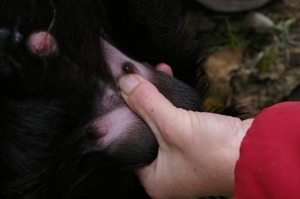
Step 3: Take the scrotum in one hand and find the spermatic cord with your other hand. Be sure the testicles are down into the scrotum and hold them in place with your hand. Move your fingers above the testicle and find the spermatic cord (you may need to use two hands for this). Once you have the cord identified, place it in between the fingers of the hand that is holding the scrotum.

Finding spermatic cord. Note the tiny teat that is above the testicle and my left thumb in photo.

Finding spermatic cord. Note the tiny teat that is above the testicle and my left thumb in photo.

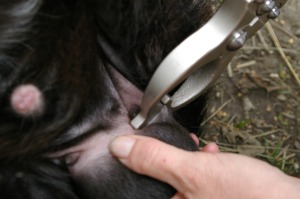
Step 4: Place the Ritchey Nippers over the cord and clamp it down firmly.  Check to be certain that you have the spermatic cord between the nippers and that it hasn’t slipped off to one side and avoided being crushed. Hold the nippers clamped in place for 20-30 seconds. Be sure not to clamp the tiny teat with the nippers; clamp below the teat and above the testicle. Then repeat on other side.

Holding the nippers in clamped position making sure the spermatic cord is under them.

Holding the nippers in clamped position making sure the spermatic cord is under them.

The Ritchey Nippers work by crushing the spermatic cord thereby cutting off the blood supply to the testes. The testicles will eventually atrophy due to the lack of blood supply. The scrotum however will be visible for the rest of the animal’s lifetime. Although this is supposed to be a bloodless method, my research reveals that you can break the skin. Be sure to check each animal for broken skin and apply antiseptic and give the kid an injection of tetanus antitoxin if broken skin is found.


15 Comments

Filed under Animal issues, Castrating goats, Ethical farming, Goats, How to..., Learning to Farm

Goat butchering day: a graphic photo documentary

Warning: This post contains graphic photos of the butchering process. Do not read any further unless you are genuinely interested in learning how to butcher animals.

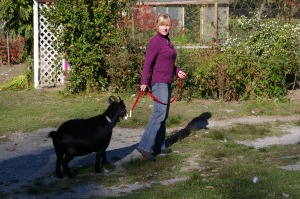
Leading Sundown to her meeting with her maker.

Leading Sundown to her meeting with her maker.

Well, I had thought I would have to wait until hunting season was over in order to muster the courage to do in one of my goats; but after butchering the rest of my ‘Jenny Craig’ Cornish Crosses (25) and all of my turkeys (32) this week, I found I was in the mood to keep going. My friend Clarence called last night to see if I wanted to go for breakfast this morning, “A pick up and delivery,” he said, letting me know he would do the driving.  He took me for pancakes at the local diner, and over breakfast we talked about various things, the upcoming moose hunt being one. “You know, I saw a big bull moose on Wednesday on my way home from Williams Lake. He crossed the road in front of me right there at Louis Creek,” hands moving out in front of himself from left to right, “and he had your initials on his ear, my dear.”

While on the subject of meat, I asked him if he’d help me butcher one of my goats,”Why sure. Any time. When do you want to do it?” “Today, after breakfast.” He said he had a few things to attend to first but that he’d be back later in the afternoon. When he dropped me off he called out, “I’ll be back at 2pm to help you out, OK!”

When I asked him if he would mind helping, I imagined that he would do the actual killing part; after all, that was the part that I thought I would have the trouble with. However, when he arrived there was no discussion about whether or not I’d be doing the shooting. “OK my dear, place the bullet right here,” he gestured with his left finger-tip-less hand to her forehead. “You only need one cartridge to do it right and she’ll go down, just-like-that.”

I was surprised by my own matter-of-factness. After all, I’d named and tended to Sundown for nearly five years. But my only concern was that I shoot her well so she wouldn’t suffer–I certainly didn’t want to have to shoot her twice or, god forbid, a few times. She was pretty calm  as I led her to the ‘gallows tree’ but every now and then kicked against the rope that held her. I was a bit concerned that she would kick up a fuss just as I was about to shoot so I got in close, took aim quickly and fired. She went down instantly, “That’s it. It’s all over.” Before I really registered that I’d done it, Clarence was already slitting her throat and she was bleeding out.

We went to work on skinning her front side before hanging her from the tree so we could spill the entrails. He talked me through most of the work–I like that about Clarence: he doesn’t take over and do the job for you. Rather, as a good teacher and mentor he’s happy to watch over his apprentice and even endure a few mistakes. “Oh my, she is fat… I don’t think I’ve ever seen so much fat on an animal I’ve butchered before!” he said, cutting through the beautiful white lard that was between her body and her skin. Indeed she was fat–too fat. I’d been feeding the nursing goats a lot more in order to keep their weight on, and the other goats were clearly taking advantage of the extra grains, hay and forage.

Once we had the goat butchered out, I sawed her in half and split her into two sides until she looked like two minuscule sides of beef. Clarence helped me rinse her off and bag her up, before he left. I then put her in the truck and drove her to the local butcher for hanging. On the way in to the store, I barely got a second look. On the way out, however, I stopped to talk to a friend then as I went to leave a stranger nodded politely at me. “After you,” he said gently motioning to the doorway, looking me up and down, “A bag of blood in your hand, and blood spatter on your pants… I’d hate to think what happened to the guy that cut you off!”

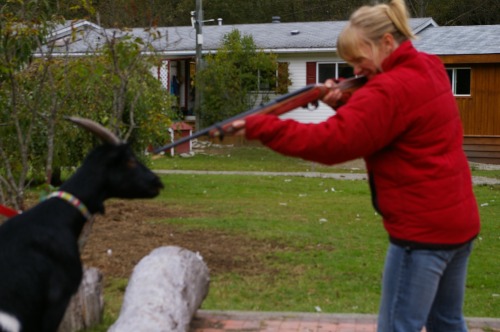
Step one: shoot the goat in the forehead. If you do not know how to do this, or do not have a good understanding of the animal’s anatomy, then get someone experienced to help you. This should be a clean kill so the animal does not suffer needlessly. Although this was my first time, I had Clarence watching over me as I did this. Also, I now have a lot of animal butchering experience and know exactly where to place the bullet.

Get close to the goat with the gun so you don't miss in the event she moves.

Get close to the goat with the gun so you don't miss in the event she moves.

Step two: slit throat being sure to cut through both jugular veins so it bleeds well and completely.

Be sure to slice through both jugular veins on either side of the windpipe to get a good bleed.

Be sure to slice through both jugular veins on either side of the windpipe to get a good bleed.

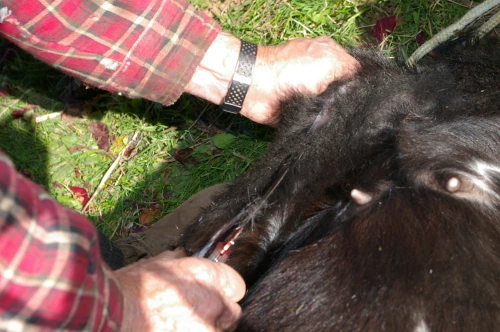
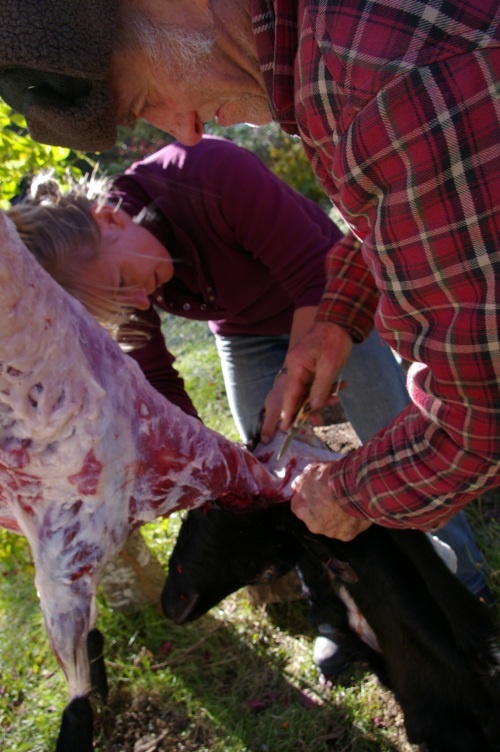
Step three: slit skin from ankle to anus on either back leg and then slit the skin up the belly to the neck. Begin to skin the goat separating the skin from the meat.

Make a cut through the skin from the ankle to the anus on both hind legs.

Make a cut through the skin from the ankle to the anus on both hind legs.

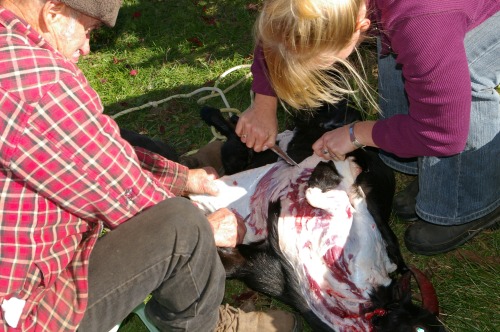
Carefully separate the skin from the animal leaving the meat with the carcass.

Carefully separate the skin from the animal leaving the meat with the carcass.

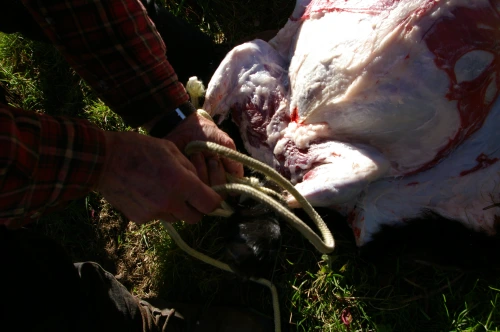
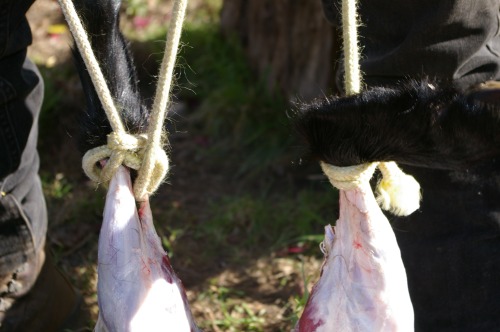
Step four: When the skin is off the front of the body, make two cuts in the ankle between the tendon and the bone with your knife. These holes are for slipping a rope through in order to hang the goat. Hang the goat high enough to continue working comfortably.

Cut hole between the tendon and bone of each hind leg then slip a rope through for hanging.

Cut hole between the tendon and bone of each hind leg then slip a rope through for hanging.

Rope threaded through legs for hanging.

Rope threaded through legs for hanging.

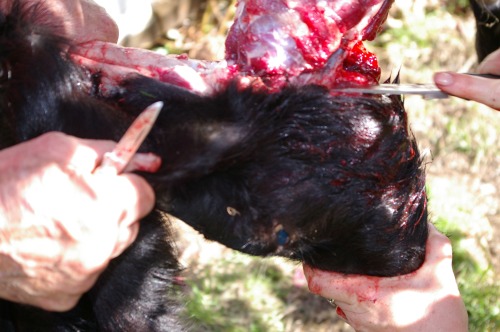
Step five: Finish skinning the goat completely and cut the head off the goat.

Once the skin is completely off the animal, you can sever the head away from the carcass.

Once the skin is completely off the animal, you can sever the head away from the carcass.

With a knife or meat saw, remove the head once you get the animal completely skinned.

With a knife or meat saw, remove the head once you get the animal completely skinned.

Step six: Cut the belly open carefully making sure not to cut the intestines. You want to just cut through the skin. When you get to the breast bone you will need a meat saw to finish cutting to the neck.

Carefully cut open the belly of the goat being diligent about not cutting any of the innards.

Carefully cut open the belly of the goat being diligent about not cutting any of the innards.

Step six: Begin to let some of the contents fall out of your way. Take the meat saw and cut through the pelvis. Grab a hold of the rectum with one hand and cut the anus away from the inside of the goat. Do not cut the intestine or rectum! Let the contents spill out of the cavity.

Open the belly up completely being careful not to let the innards begin to fall as the rectum will rip and spill fecal contents throughout the belly cavity.

Open the belly up completely being careful not to let the innards begin to fall as the rectum will rip and spill fecal contents throughout the belly cavity.

With a meat saw (or in my case my knife) cut through the breast bone right up to the neck.

With a meat saw (or in my case my knife) cut through the breast bone right up to the neck.

Cut through the pubic bone and around the anus so it can come free as you pull out the rectum along with the innards.

Cut through the pubic bone and around the anus so it can come free as you pull out the rectum along with the innards.

Step seven: Save the heart and liver. Cut the heart open and bleed it. Wash the liver and heart well and put in cold water until you can refrigerate them.

Cut open the heart and rinse the blood out of it.

Cut open the heart and rinse the blood out of it.

Step eight: Cut the esophagus and trachea away from the neck and throat area.

Esophagus and trachea removal.

Esophagus and trachea removal.

Goat carcass cut into two sides. We are not cutting off the extra fat before taking the meat to the butcher for hanging.

Goat carcass cut into two sides. We are not cutting off the extra fat before taking the meat to the butcher for hanging.

Step nine: With the meat saw, cut the carcass in half from tail to tip. You now have two sides of goat ready for hanging in a meat cooler. Wash them with clean water and hang for several days to cure.

As for how I’ll cook it? I’ll likely follow one of these tasty suggestions from Phelan of a Homesteading Neophyte!

81 Comments

Filed under Butchering, Educational, Food Security, How to..., personal food sovereignty

What’s behind door number two

My new home made barn door!

My new home made barn door!

My red barn which we built five years ago was to have three sliding doors for its three openings, all hanging from the same rail. However, so cute was the final product and so perfect its lines that we felt a rail would spoil the façade; besides, it’s nice to look across from the house and see the hay bales inside the middle opening.

The right hand side was soon filled by a door fortuitously found at the local dump, to contain the goats at night when I decided, after confronting as cougar on our driveway, that they should perhaps have a dormitory for the danger hours, at least.

The third, left hand space served as a garden tool shed until we decided this spring to try goat milking. I ordered a machine, and we built a stanchion inside that room. All it lacked was a door, and now as the chance to have what I had always desired: a barn door made of planks with a ‘z’ support.

Mechanism for hanging the door.

Mechanism for hanging the door.

The project was the more fun because my friend Dave agreed to teach me how to do it properly, just as soon as we were finished clearing the front forty. So it was that as the first of our summer’s heat waves subsided and the last goat fence post was planted and nailed up, that we decamped to the front lawn and awaited Dave, his wife Judy, his home-milled cedar planks, and his tools.

Dave is an exemplary tool-man. Not only does he have one for every job (and I mean every job: he has eight skill-saws, each with different blades and angles, so that he never has to alter one of them), but he also maintains his tools in perfect condition, whiling away the hours after his 15 hour days labouring, with cleaning their motors and sharpening their blades. So he literally “set up shop” for this operation, with power cords and extension leads festooning the ground. He had carefully (and lovingly) selected the best, driest cedar from his drying room for this job. He had thought to use hinges, but when I produced the remaining two meter length of barn door steel railing (left over from my brainwave utilization of the majority of the rail on the new turkey barn), he was delighted. Now he could make the door a respectable width, rather than the cramped door opening of our red barn.

I'm tightening the bolts on the barn door.

I'm tightening the bolts from underneath on the barn door.

As always, Dave was an excellent teacher. When I asked why he didn’t find my requests to learn these ‘manly’ jobs odd, he replied that his parents had raised him and his eight siblings totally alike, “All of us peeled carrots and chopped and stacked wood.” Jobs were there to be done, and a son or daughter should both be equal to the task.

We spend almost a day planing those boards smooth, using various sanders and progressively finer papers. You have to be careful with cedar that you don’t start tearing the fibers away, so sanding with the grain is a must. To make sure the planks didn’t shift or warp, Dave taught me to use his router to make grooves along the edge of each plank to accept a one inch plywood cookie which would dovetail into the next plank’s groove. We glued all this together for extra strength and snugness, then bolted on the beloved ‘Z’ reinforcing frame.

The rail and pulleys took some adjusting until the door was the right distance from the concrete and from the barn wall, and even Dave learnt something when he decided to grind off the ends of the bolts after we had sanded the door—which left an iron filing grey cloud around each bolt, staining the wood. More sanding and a cedar stain covered everything up. Now we have an easily opening barn door, just right for maneuvering a recalcitrant milking goat from pen to stanchion!

5 Comments

Filed under Developing Community, Educational, How to...

Not Dabbling in Normal today

Zucchini squash blossoms make an interesting base for several unique recipes.

Zucchini squash blossoms make an interesting base for several unique recipes.

I’ll eventually post this up here on my blog, but today it is reserved for Not Dabbling in Normal! I am planning to do a series of recipes using this unique ingredient this summer. It is a great way to keep those pesky overly enthusiastic zucchini’s at bay.

3 Comments

Filed under Heirloom vegetables, How to..., Recipes

Motherhood-it’s not for everyone

Last week we were lucky enough to find reliable farm-sitters and sneak away to my brother’s wedding near Vancouver. This was not an easy task thanks to the fires in our area. We had planned on driving out but when we got to the bottom of ‘The Hill’ the officials were there just closing the road and bringing the pilot car off the mountain. “I could feel the heat from the fire right through the truck!” exclaimed one of the men, looking thrilled to be out of harm’s way.

Under normal circumstances this would not be a problem. If I lived near a city where there were lots of flights to choose from, and normal sized planes that hold a decent number of people, I would not have begun to panic during the hour long return drive home down the valley. But in Bella Coola getting a last minute seat on a flight is not always guaranteed! Here, when they use the ‘big’ plane it holds 19 passengers. Furthermore, although we have a scheduled flight every day, there is no guarantee the plane will get in. Often it is canceled due to heavy clouds, and in this case, I was worried that the smoke beginning to billow off the mountainsides might make it impossible to land. Nevertheless, I refused to believe that I might not make it to my brother’s wedding.

Thankfully, the stars were aligned, we got seats on the flight to Vancouver and managed to arrive in the nick of time (I was part of the wedding party!). That was the good news. The bad news was I didn’t get to stay long and visit anyone after the wedding: a check-in call to our farm-minders  brought news of evacuation alerts, so we had to get on the plane and come back home right away, thanks to the threat of the fires.

During our three days away our farm-sitters noticed that Shiraz was no longer feeding one of her kids. They were observant enough not only to notice this new behaviour from her but also to take control and hold her while the little one fed–the mark of dependability in a babysitter! Now that we are back, things have gotten worse and she is barely feeding any of them.

Goat breeding: If only I’d read the fine print

While researching the reasons why a doe might reject her kids, I came across this site which describes my experience with Shiraz to a T!

Many new producers do not know what to expect from their stock, and some are very unhappy when they discover that goats are not always the easiest animals to manage.

In light of my experience with her thus far (see Oh what a night), I would say that Shiraz qualifies as having achieved ‘not the easiest to manage’ status. The difference between Shiraz and my other mother Fatty-Fat is extreme, and this is the kind of experience the above article describes. My experience is particularly marked in that I only have the two goats, so I don’t have the 10-15% of my herd with this dysfunctional behaviour as the article suggests may be the case, and what producers should allow for. Instead, I have a 50% problem! Thankfully, this translates to only one goat and three kids to care for–I don’t know what I’d do if it were several goats and a full nursery! Perhaps I should have done some more research before launching into goat breeding! The next paragraph in the article unfolds as if reading my thoughts:

The majority of new producers receive a big reality check when their first kidding season arrives if they have not done their research and adjusted their expectations accordingly.

You don’t say. I’m not really sure what I expected, so I don’t really have many expectation adjustments to work through. I do, however, have to figure out how to get these kids fed! I thought it would be easiest if I could trundle down to the local veterinarian’s office (if I had one, that is!) and get milk replacement and a milker/feeder type thing and take over the job myself. This article doesn’t support my wishful thinking:

Some people bottle feed, but I don’t recommend this… I have also had big problems with the milk replacer actually killing the kids. It causes a high percentage of the kids (over 50% in my experience) to develop ulcers which eventually rupture killing the kid.

As luck would have it the vet was going to come the 458 kilometers into town this weekend and I was considering asking her to bring some milk replacer, but thanks to the fires she’s had to cancel her trip! Now out of options, I’ve taken to holding Shiraz between three and four times per day in order to let the little fellows feed: basically whenever I hear them crying.

The key to maintaining some control over her is to hold her tail, this way she is less likely to sit down to evade her kids.

The key to maintaining some control over her is to hold her tail, this way she is less likely to sit down to evade her kids.

This is not an easy task; as you can see, Shiraz is a strong goat! She is also a smart goat and has all sorts of tricks she pulls in order to evade her milking duties. One of the most effective is to sit down while I’m holding her. This is very effective and difficult for me to oppose. I have found that by grabbing hold of her tail she is far less likely to try this one on. Keeping ahead of her is a monumental task. Not only that; it is taking a huge amount of my time. I hold her for about a 1/2 hour each session in order to let all three feed to their tummies’ contentment.

One satisfied, full bellied kid.

One satisfied, full bellied kid.

I’m hoping she will once again accept her kids, though I’m alarmed at how long the article suggests this may take:

Does that are intent on killing the rejected kid(s) require more drastic measures. I generally put a halter on them a couple of times a day and tie them to the fence so their kids can eat. Usually they will eventually accept the kids, but it may take a month or more before they do. You will have to decide whether the time involved is worth it.

Of course the one kid she is rejecting outright is my favourite, Sinbad. So it’s worth it! Oddly, he is the biggest and was her first born. I have checked her bag to make sure it is soft and pliable and giving milk, and there doesn’t seem to be anything wrong with any of the kids which can be a reason the doe will reject one or more. When I do hold her and they feed, they do so willingly and with gusto complete with satisfying sound effects, and until satiated. I thought perhaps she feels she doesn’t have enough milk for three. At first I was alarmed with both her and Fatty as they began to lose weight during the first few days after kidding. Again, I checked with my doctor friend who said that this is certainly normal with nursing women. I upped their feed rations and within days brought their weight loss to a halt. Shiraz seems to be holding condition nicely and has a full, heavy bag.

Performing acu-pressure on Shiraz helps her calm down.

Performing acu-pressure on Shiraz helps her calm down.

One of the many things I’ve learned through working with my horse is about horses stress and how to relieve it through acu-pressure points. While I’m holding Shiraz, I use the acu-pressure point just below her nose in order to help calm her down. In horses, this point is the locus of an endorphin release. I have used it on myself and know that it works for humans, therefore, I presume that it will also work for Shiraz. Much to my relief it seems to have some effect.

After some light acu-pressure Shiraz relaxes enough for me to stand up and take only a light grip on her while her kids continue to feed.

After some light acu-pressure Shiraz relaxes enough for me to stand up and take only a light grip on her while her kids continue to feed.

While contemplating my predicament, I have been considering my next year’s breeding program and my diminutive scale farm, and wondering who I should cull. Sundown didn’t get pregnant at all this year so she is on the list of possibles because she may be sterile, though of course this is not for certain. Thanks to Shiraz’s insistence on maintaining the ‘not the easiest to manage’ status, she too has made the list. There is no way I can do all this again with Shiraz if this is the way she’s going to behave each pregnancy, although, much to my chagrin, according to the article this is not usually the case:

In my own operation 10-15% of the does that kid in a year decide to reject at least one of their kids, and the does that did so this year are not the same does that pulled that stunt last year.

My doctor friend and her doctor husband dropped in yesterday to see the farm and I relayed the story to them. He said that he’d had a dog that ate all her pups many years ago and they found out later that it was due to a vitamin deficiency; he suggested this may be the problem with Shiraz. I too had wondered about this but had dismissed the idea because of the conditions in which I’m raising them: she has sweet feed two or three times per day, access to good hay, a mineral lick, free access to a free-form mineral powder suggested to me by the vet, and all the good clean native forest browse she could ever possibly dream of having. These goats are in fact actually quite spoiled.

Upon hearing this, my other doctor friend said that it may be an absorption problem and/or simply a lack of calcium due to the heavy demand that bringing up three kids has on her body, so she suggested that I get some calcium supplements and see what happens. When I asked if I should get liquid calcium she turned to me and laughed: “Just get Tums and crush it in her morning grain.” This doctor friend really should have been a vet! This morning, following my Goat-Doctor’s advice, I got the peppermint flavoured Tums out. Before I had a chance to crush the tablet into her food dish Shiraz snarfed it out of my hand, scoffed it down in seconds flat and immediately snuffled around for more. Either she really likes peppermint flavour or she realizes this is what she is missing. In light of the fact that none of my goats will touch the mint in my garden, I’m suspecting it is the latter!

My guess is that my doctor friend is correct, that having three kids makes her more susceptible to this deficiency than Fatty-Fat who is happy in her new role as mama-goat to twins. I’ll keep up with the calcium tablets, reinstate the morning molasses tea and see if this makes a difference. If anyone has other suggestions, I would welcome them!

…As I write this I reflect that in this whole process I am measuring my own situation. I sympathise with Shiraz. I never wanted children and chose not to have them. When we husband animals we take away their right to choose. After going through this with her I wonder if she too would have chosen not to have kids if she had her druthers!

23 Comments

Filed under Animal issues, Educational, Goats, How to..., Learning to Farm, milking goats

Low-carb chocolate cake

Low Carb Eating:

This low carb chocolate cake will fool people. It is very decadent with an almost fudge-like texture.

This low carb chocolate cake will fool people. It is very decadent with an almost fudge-like texture.

Over the past few years, I’ve begun to lean towards a lower carb diet. For one thing, I’ve managed to gain a shocking amount of weight, largely thanks to too much healthy home grown food coupled with a penchant for cooking! One of the things that really helps me take off the excess relatively painlessly is cutting out the starchy carbs: breads, potatoes, white flour, rice, pasta, and sugary food. In general, I find it quite painless to do right up to the part where I find chocolate in that ‘give it up’ category–I simply cannot do it. So, I search for recipes that either are low in carbs that include chocolate, or adapt my favourites accordingly. This recipe was already relatively low in carbs because it called for only 1 heaping tablespoon of flour. In order to make it even less carb laden, I substitute the sugar for Nutra-sweet and replace the wheat flour for soy-flour. Viola, I turn a nearly 200 gram cake into a 115.5 gram cake. So, each slice is lowered from 20 grams to 11.5 (considering 10 slices per cake). If you are opposed to using ‘fake sugar’ and more concerned with using natural ingredients, then this cake is still a relatively low in carb dessert thanks to the miniscule amount of flour used.

Note: this cake is best made a day ahead

1. Ingredients:

  • 1/2 cup  minus 1 Tbsp butter
  • 7 oz dark chocolate
  • 1 C sugar (or sugar substitute)
  • 4 eggs
  • One rounded tablespoon of flour (I use soy-flour to make it even lower in carbs)
  • 1tsp vanilla (I have also used Kahlua, Amaretto, and Frangelico for a variance on the flavours)

2. Directions:

  1. Pre-heat your oven to 180°C (350°F).
  2. Line an 8-inch round cake pan with parchment paper (no need to if you’re using a non-stick pan).
  3. Melt together the butter with the chocolate (in a double-boiler or in the microwave slowly and for just a few seconds at a time).
  4. Transfer into a medium mixing-bowl. Add in the sugar, stir with a wooden spoon and let cool a little.
  5. Add in the eggs one by one, mixing well after each addition.
  6. Finally, add in the flour and mix well.
  7. Pour the dough into the pan, and put into the oven to bake for 30 minutes. Turn the oven off but leave the cake inside for another ten minutes, then put the pan on a cooling rack on the counter to cool completely. Cover with plastic wrap, refrigerate, and take it out about an hour before serving.
  8. Fantastic with a dollop of fresh whipped cream on the side–its carb free!

9 Comments

Filed under How to..., Low carb foods, Recipes