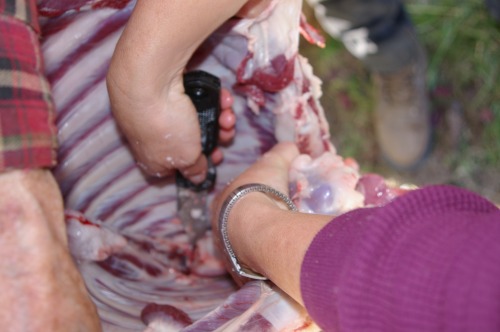
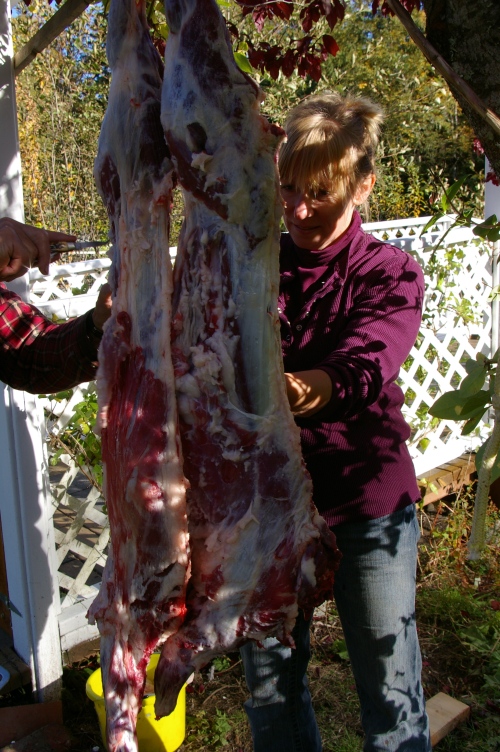
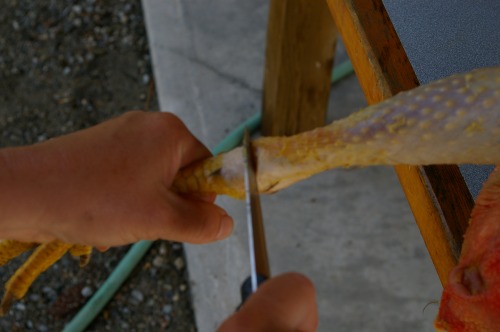
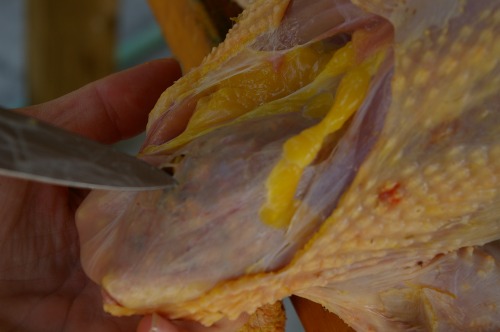
Category Archives: Butchering

Men who stare at goats

As many of you know, I’ve not been at Howling Duck Ranch for several months now. Living away from my home, the ranch, and all my animals has not been easy.  Consequently, I’ve been remiss with my regular posts. I have struggled with many things these past few months: from the lack of anything to write about (what do I have to say without my farm?), to the lack of desire to bore you with my life’s struggles. After all, that is not what brought you to this blog!

Suffice it to say, these past few months has been full of difficult decisions:  downsizing the ranch,  possibility selling the place, and finally, dissolving my  marriage.

Thankfully, I’ve had a friend living at Howling Duck Ranch. She’s been doing a wonderful job of taking care of the place and the animals, which has been a huge relief for me. She has, quite literally,  helped keep the wolves at bay! However, she can only stay until June and I’ve not yet found a suitable or affordable alternative for the Howling  Duck Ranch crew. Consequently, I’m faced with being realistic and that means disposing of some critters.

My farm sitter friend is helping with this task and has already given away many of my chickens. The goats however are not easy to find homes for. Moreover, I’m emotionally attached to them. I can’t quite part with them yet–they are my family.

However, I couldn’t avoid the facts forever. A couple of weeks ago, I had some time to get away so I planned a quick trip into the Valley to butcher some of the kids. Even a few less goats to feed at this stage would be helpful. I know this sounds contradictory to their status as family, but the boy kids always were destined to be food. Also, I convinced myself that rather than give them away and risk them being eaten by a grizzly bear or cougar, I’d end their lives myself–at least I know it will be done quickly.

While planning my trip, a blog follower sent an email requesting to visit Howling Duck Ranch and wondered did I do ‘farm stays’. Before leaving the ranch in January, I was planning to do just that. At the time, I wasn’t sure how to make that happen or what it would look like. Suddenly, before my eyes was an email request that had nestled in it an offer I couldn’t refuse: “If you ever need help with butchering goats, I’d be happy to help out.”

We exchanged a few more emails (one of which he confessed to having run a butcher shop!), and before I knew it I was planning my first ‘hands on farm stay’ experience at Howling Duck Ranch! Not only that, with someone who had a skilled set of hands. What I didn’t know at the time was just how many hands would be at my disposal that weekend.

The morning started out as planned, with me rounding up the kids:

Fetching the first kid of the morning.

Making the killing shot:

Not the funnest part of the job but a necessary one.

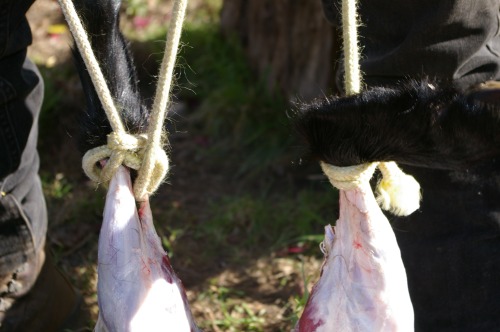
Prepping the carcass by hanging it in a tree, ready for skinning:

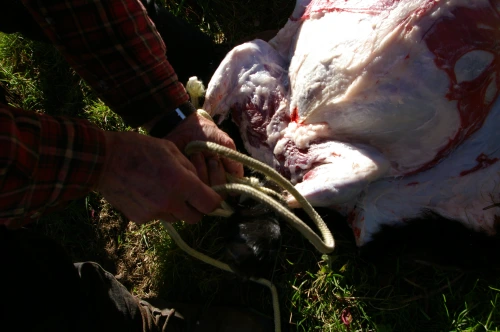
Waiting for another piece of rope to tie the second leg up by.

However, it wasn’t long before the men were involved. Before I left Smithers, I called Clarence to say I’d be in the valley (I’d never hear the end of it if he found out I’d been in town and not visited), and my friend Mike Wigle to see if he was interested in taking some photos (I encourage him to develop a farm photo portfolio every chance I get)! Both men agreed to come to the butchering day. But it was my farm stay visitor who was ‘first man in’.

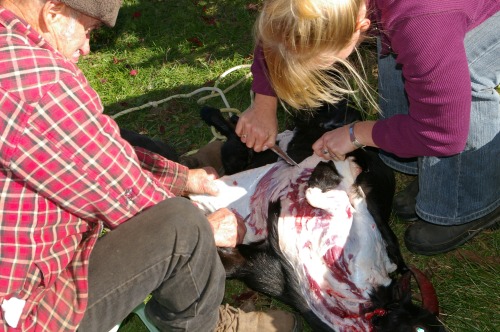
Enter stage left. Jeff jumps in to help with the skinning process:

Jeff is the first man in on the scene and is laughing at how small and easy a goat is to butcher compared to the huge cattle beasts he's accustomed to working with.

Jordan came with Clarence and is soon eager to get his hands in on the process too:

Clarence's great grandson, Jordan casually approaches and offers to help.

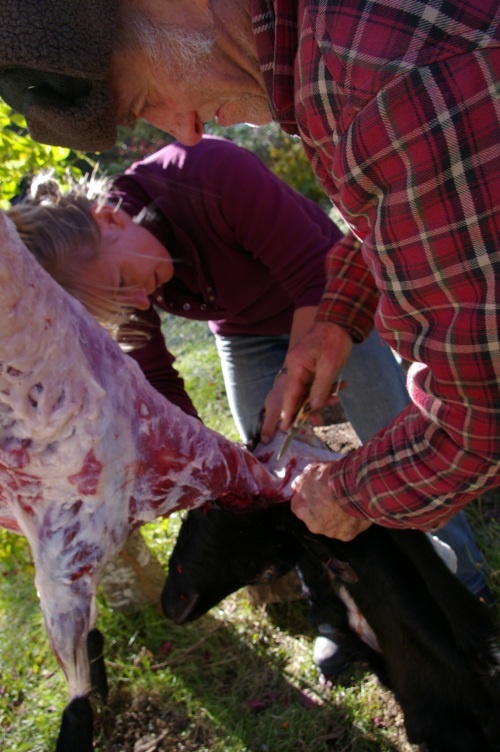
There were some comments about the lack of edges on my knives followed by a request that I find a wet stone. As I dashed off in search of the stone, the men quietly moved in and without ceremony, took over the job:

At this stage, I'm enjoying watching men at work!

The three of them made light work of the butchering process and I was thrilled to have the help. It gave me some time to visit with my friend Colleen, who I’d not seen for months and had dropped in unannounced for a visit. Without the men at work, stopping to visit with Colleen was a luxury I would not have otherwise afforded:

No longer needed, I move away to go visit with my friend.

Eventually, even the dogs got in on the action:

Tui licks the saw and waits to be handed some tasty offal.

Colleen’s tiny pooch ‘Peanut’ gives a first rate effort as part of the ‘clean up’ crew:

Peanut eagerly eating some offal.

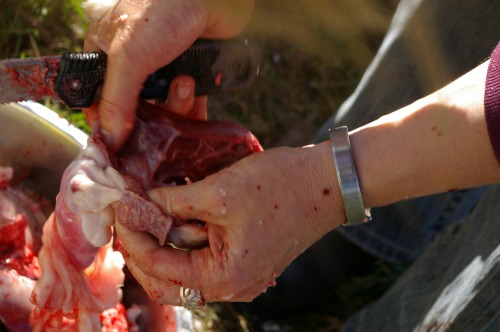
It is not long before the goat is in pieces:

Clarence and Jeff take over the process and cut the goat into recognizeable cuts of meat. Note: I love the look in Tui's eyes. She knows she's in for a treat as does the chicken!

Soon we’re ready for round two. At this stage, I barely have to lift a finger, let alone a goat:

Jeff is a quick study: this time, I don't even have to fetch the goat!

Although a fast and furious paced weekend, it was a wonderful visit home. Thanks to the men who stare at goats–my new friend Jeff, and my wonderful old stand-by’s Clarence, Jordan, and Mike–it was made all the more enjoyable. Thanks guys!

13 Comments

Filed under Butchering, Goats

How to field dress a moose

Warning: Graphic photo documentary of the moose butchering process

One of my great life-skills mentors, Clarence, and me with my downed moose.

The moose is the largest extant species in the deer family. On average, an adult moose stands 1.8–2.1 m (6–7 ft) high at the shoulder. Males weigh 380–720 kg (850–1580 pounds) and females weigh 270–360 kg (600–800  pounds). Typically,  the antlers of a mature specimen are between 1.2 m (3.9 ft) and 1.5 m (4.9 ft). Behind only the  bison, the Moose is the second largest land animal in both North America and Europe (Wikipedia).

In light of the above statistics, it is not surprising that it is once the hunter’s moose is ‘on the ground’ that the real work begins! Processing 1000 pounds of animal (give or take a couple hundred pounds!) is not for the faint-hearted.
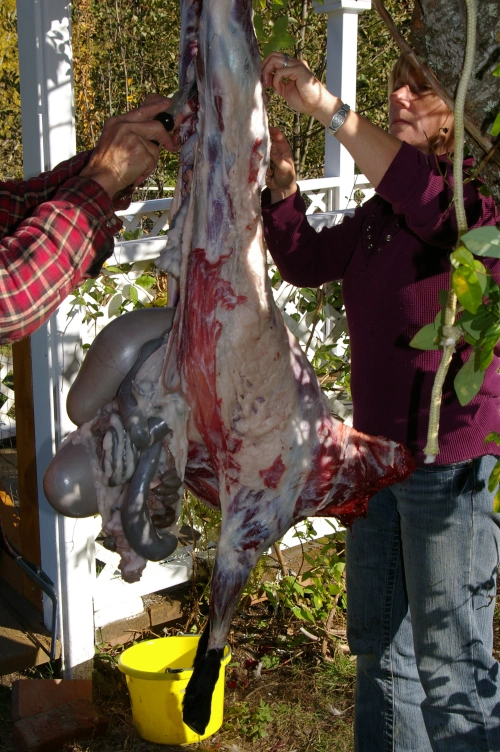
When my brother heard I was going moose hunting, he was quick to advise me that the guys he works with, who also hunt, said I should buy a ‘Dewalt Cordless Sawsall’ in order to make the butchering process easier. However, I knew that Clarence and David would view such a tool as an unnecessary frivolity, and that they would likely teach me how to do this with minimal equipment! As my friend who knows these men well confirmed, “You couldn’t find better teachers, because they will not only teach you amazing bush skills but they’ll also teach you to be tough.” Part of the requisite ‘being tough’ is doing without a lot of luxuries.
Besides Dave’s favourite ‘never-leave-home-without-one (or two)’ Gerber Exchange-a-blade saw, nothing more than a pocket knife and 13 pillow cases are required to fully dress out and process a moose in the field.

Step one: Remove the hide from the moose.


Start just above the tail, making sure to cut through the skin but not into the layer of sub-cutaneous fat.

Start skinning just above the tail of the moose and all the way up the back to the head between the ears. Once you have the skin off the exposed side of the animal, it is time to pull it over on to the other side. Repeat the process of skinning on the other side until you have the whole ‘cape’ removed.

Step two: Secure the moose by tying it to something steady.

Roll the moose on to his back so his legs are in the air, and tie the two front legs off  with your parachute cord (see hunting lesson one: the possibles bag) to something solid. In our case, we had one leg tied off to the quad bike and another to a small, twiggy bush. Because this is a big maneuver, I was fully involved and could not take a photo!

Step three: Cut the trachea high in the throat.


Dave cutting through the throat meat to remove the trachea. Note the parachute cord tied to front legs in background.

Cut through the throat muscle to get to the trachea and esophagus. Cut through both tubes to free them from the moose. They will be pulled out, along with the other gut contents, through the belly at a later stage in the process.

Step four: Retain proof of the sex.

Proof of sex: exposed penis hanging down with each testicle laying on belly.

Be careful not to lose the penis or testicles until you get the moose home, because ‘proof of sex’ is required by law if you are checked by the Conservation Officer. Cut the hair from the sex glands and expose them, laying one testicle to each hind quarter.

Step five: Open the belly.

Clarence demonstrating how to cut through the moose's belly.

Carefully cut through the belly skin, being sure not to cut any of the gut contents. Begin at the pelvis and work your way up to the rib cage. It is particularly important not to cut through the intestines. Note the tiny pocket knife in Clarence’s hand; it is the only knife I’ve ever seen him use. This is what he butchers all his chickens and turkeys with as well!

84 year old Clarence still going hard and working his way up the belly cut.

Step six: Cut through the breast bone to open up the chest cavity.

Dave hand sawing his way through the breast plate of my moose.

This is the first moment you need to get out your Gerber Exchange-a-blade-saw. Cut through the breast bone, being careful not to damage the guts inside the chest wall. Once the breast plate is completely opened, finish cutting through the belly, meeting the chest wall cut.

Step seven: Haul out the guts.

My right index finger is in the hole where my bullet when through the moose's lungs.

Taking a good grip on the trachea (I cut a small hole in the trachea just large enough to put my fingers in and get a better grip on it), begin to pull the guts out of the moose away from the chest towards the belly. You will have to cut through the diaphragm in order to get the lungs and heart through into the belly cavity. Note the blood on the side of my cheek. Put there by Dave to indicate the first part of my initiation into ‘the wolf pack’; the rest of the initiation required me to eat the some of the heart and liver!


Hauling out the guts is a team effort!

Clarence is cutting through the diaphragm so I can get the lungs, heart and trachea through into the belly cavity. Once complete, we then haul out all the contents from the body onto the snow.

Step eight: Cut through the pelvis and anus.


Dave beginning the pelvis cut for me.

Be careful not to cut through any intestine when you cut through the pelvis bone and around the anus.


Gutted moose held open for quick cooling.

Because it was nearing dark at this stage, we took the heart, liver and tenderloins back to camp, and I had the first taste of my moose that very night!


21 Comments

Filed under Animal issues, Butchering, Educational, Gathering from the wild, How to..., Hunting, Moose, Wild game

Tasting Sundown

Two beautiful sides of goat for the eating.

Two beautiful sides of goat for the eating.

As many of you will know, I butchered my first goat last weekend. Her name was Sundown. When my friend Clarence and I were butchering her he asked me how I chose her to do in. I told him my reasoning: she was the only doe not to get pregnant last year, she is the bottom of the heap in the other goats’ eyes, and the most stand-offish goat in the paddock with me. So, I rationalized, even if she were to get pregnant next time, I didn’t want her teaching her kids to be stand-offish with me. Summing up, it was obvious that she had to go.

I took her to the local butcher for hanging. She hung for 5 days and then the butcher cut, packed, and wrapped her for me–all 40 lbs of her. Clarence was keen to help me do that piece as well, but the weather has turned and I just wanted the job done. I am more interested at learning how to cook her.

I have just made my first goat curry and enjoyed every bite.

Curried Sundown

1 lb goat meat cut into stewing pieces

1 onion, chopped

3-4 tbsp oil (I use olive, but for more traditional curry you should use canola or vegetable)

2-3 cloves garlic, chopped

2 in piece fresh ginger, grated

1 package A Taste of India Hyderabadi Biriyani mix

1/2 can coconut milk

vegetables such as zucchini, peas, green peppers (or a mixture of them)

salt to taste

3-5 tbsp cilantro, al gusto

Fry onions in oil until translucent and tender. Add goat meat and cook until all pink is gone. Add ginger, garlic, and Hyderabadi biriyani paste along with a cup or two of water. Then add 1/2 can coconut milk and simmer for several hours until goat meat is tender. Add the vegetables. When the veggies are tender, add the cilantro. Adjust salt to taste and serve with steamed rice and naan.

7 Comments

Filed under Butchering, Recipes, Uncategorized

City mouse acquires country mouse skills

My first attempts at knowledge transfer

Tami and I pick out the first roosters to be dispatched.

Tami and I pick out the first roosters to be dispatched.

City mouse met country mouse recently over a chicken carcass here at Howling Duck Ranch. I have a city friend who, inspired by my posts about slaughtering turkeys and chickens humanely, was keen to come up for a visit and learn something about taking control of his own food source. He brought his four year old daughter Meah along, and his partner Tami. As we discussed the planned cull, Virgil recalled the scene in Lonesome Dove (the great TV western which I recommend to all my friends and visitors) where Clara’s two girls announce the arrival of visitors to their lonely ranch and blithely ask, ‘Can I kill a pullet for dinner, mama?’ As he relayed the story to me he concluded, “If a ten year old little girl can be excited by it, a 30 yr old man oughta be able to do it, too!”

The day of the slaughter of my meat birds dawned and I got up early, as you have to when there’s so much preparing before and cleaning up after. It was after I’d got the gas heating the water barrel, and were about to select our first two roosters, that Virgil and Tami emerged warily from the house. Virgil walked over with confidence but Tami approached the turkey barn verandah with apparent hesitance. I checked in with them that they really wanted to do this and they both nodded. Tami and I went first to the barn to pick out the first victims. I showed her how to catch a chicken which she mastered adeptly.

Once back outside, I promptly demonstrated the technique of knocking out the bird by whacking its head against something hard, in my case it is a saw-horse, to render the bird unconscious before slitting the jugular. It makes for a more humane dispatch.

Virgil's first attempts at using the chicken plucker.

Virgil's first attempts at using the chicken plucker.

Virgil was keen to try, and quickly mastered the art of swinging the bird overhead but controlling the wings and legs so as to not break any bones unnecessarily as you do this. He was an equally quick student of slitting the jugular and showed no revulsion at doing so. At the sight of running blood Tami excused herself. I later learned that she went back to the house and tried to keep from fainting; a confirmed city slicker would have stayed there, but—to her credit—she overcame her squeamishness and reappeared to help us. “That’s why my tatoo says ‘Mind over matter'” she explained when I told her how impressed with her determination I was.

Showing Tami how to gut and dress the chickens.

Showing Tami how to gut and dress the chickens. The scalder was not hot enough on the first bird so we ended up having to do a bit more hand plucking before gutting the bird.

Meah, Virgil’s not-quite-four-year-old daughter, wisely raised with no illusions or squeamishness about where her food really comes from, was simply thrilled that she was looking at tonight’s dinner. She watched keenly as I demonstrated how to scald, feather-pluck, and gut and dress the birds. She prattled on asking her dad if we were going to eat the chickens for dinner. It was all the more disappointing for little Meah when we realized that by the time the bird was roasted that night, she should be asleep. We promised her cold cuts the next day as Virgil put her to bed.

While dressing out the chickens, Tami showed her knowledge of veterinary assistant work by examining the organs and explaining how they looked healthy and why. In one instance, she was able to show me lesions on the gizzard, possibly due to the bird having eaten something sharp (I have found a nail inside the crop of a turkey).

That evening, over glasses of wine, we honoured our meal, commented on its delicate flavour, and analysed the day’s emotions. Both our visitors felt ready, both in the knowledge and emotions departments, to slaughter their own birds in future.

9 Comments

Filed under Butchering, Chickens, Educational, How to...

Goat butchering day: a graphic photo documentary

Warning: This post contains graphic photos of the butchering process. Do not read any further unless you are genuinely interested in learning how to butcher animals.

Leading Sundown to her meeting with her maker.

Leading Sundown to her meeting with her maker.

Well, I had thought I would have to wait until hunting season was over in order to muster the courage to do in one of my goats; but after butchering the rest of my ‘Jenny Craig’ Cornish Crosses (25) and all of my turkeys (32) this week, I found I was in the mood to keep going. My friend Clarence called last night to see if I wanted to go for breakfast this morning, “A pick up and delivery,” he said, letting me know he would do the driving.  He took me for pancakes at the local diner, and over breakfast we talked about various things, the upcoming moose hunt being one. “You know, I saw a big bull moose on Wednesday on my way home from Williams Lake. He crossed the road in front of me right there at Louis Creek,” hands moving out in front of himself from left to right, “and he had your initials on his ear, my dear.”

While on the subject of meat, I asked him if he’d help me butcher one of my goats,”Why sure. Any time. When do you want to do it?” “Today, after breakfast.” He said he had a few things to attend to first but that he’d be back later in the afternoon. When he dropped me off he called out, “I’ll be back at 2pm to help you out, OK!”

When I asked him if he would mind helping, I imagined that he would do the actual killing part; after all, that was the part that I thought I would have the trouble with. However, when he arrived there was no discussion about whether or not I’d be doing the shooting. “OK my dear, place the bullet right here,” he gestured with his left finger-tip-less hand to her forehead. “You only need one cartridge to do it right and she’ll go down, just-like-that.”

I was surprised by my own matter-of-factness. After all, I’d named and tended to Sundown for nearly five years. But my only concern was that I shoot her well so she wouldn’t suffer–I certainly didn’t want to have to shoot her twice or, god forbid, a few times. She was pretty calm  as I led her to the ‘gallows tree’ but every now and then kicked against the rope that held her. I was a bit concerned that she would kick up a fuss just as I was about to shoot so I got in close, took aim quickly and fired. She went down instantly, “That’s it. It’s all over.” Before I really registered that I’d done it, Clarence was already slitting her throat and she was bleeding out.

We went to work on skinning her front side before hanging her from the tree so we could spill the entrails. He talked me through most of the work–I like that about Clarence: he doesn’t take over and do the job for you. Rather, as a good teacher and mentor he’s happy to watch over his apprentice and even endure a few mistakes. “Oh my, she is fat… I don’t think I’ve ever seen so much fat on an animal I’ve butchered before!” he said, cutting through the beautiful white lard that was between her body and her skin. Indeed she was fat–too fat. I’d been feeding the nursing goats a lot more in order to keep their weight on, and the other goats were clearly taking advantage of the extra grains, hay and forage.

Once we had the goat butchered out, I sawed her in half and split her into two sides until she looked like two minuscule sides of beef. Clarence helped me rinse her off and bag her up, before he left. I then put her in the truck and drove her to the local butcher for hanging. On the way in to the store, I barely got a second look. On the way out, however, I stopped to talk to a friend then as I went to leave a stranger nodded politely at me. “After you,” he said gently motioning to the doorway, looking me up and down, “A bag of blood in your hand, and blood spatter on your pants… I’d hate to think what happened to the guy that cut you off!”

Step one: shoot the goat in the forehead. If you do not know how to do this, or do not have a good understanding of the animal’s anatomy, then get someone experienced to help you. This should be a clean kill so the animal does not suffer needlessly. Although this was my first time, I had Clarence watching over me as I did this. Also, I now have a lot of animal butchering experience and know exactly where to place the bullet.

Get close to the goat with the gun so you don't miss in the event she moves.

Get close to the goat with the gun so you don't miss in the event she moves.

Step two: slit throat being sure to cut through both jugular veins so it bleeds well and completely.

Be sure to slice through both jugular veins on either side of the windpipe to get a good bleed.

Be sure to slice through both jugular veins on either side of the windpipe to get a good bleed.

Step three: slit skin from ankle to anus on either back leg and then slit the skin up the belly to the neck. Begin to skin the goat separating the skin from the meat.

Make a cut through the skin from the ankle to the anus on both hind legs.

Make a cut through the skin from the ankle to the anus on both hind legs.

Carefully separate the skin from the animal leaving the meat with the carcass.

Carefully separate the skin from the animal leaving the meat with the carcass.

Step four: When the skin is off the front of the body, make two cuts in the ankle between the tendon and the bone with your knife. These holes are for slipping a rope through in order to hang the goat. Hang the goat high enough to continue working comfortably.

Cut hole between the tendon and bone of each hind leg then slip a rope through for hanging.

Cut hole between the tendon and bone of each hind leg then slip a rope through for hanging.

Rope threaded through legs for hanging.

Rope threaded through legs for hanging.

Step five: Finish skinning the goat completely and cut the head off the goat.

Once the skin is completely off the animal, you can sever the head away from the carcass.

Once the skin is completely off the animal, you can sever the head away from the carcass.

With a knife or meat saw, remove the head once you get the animal completely skinned.

With a knife or meat saw, remove the head once you get the animal completely skinned.

Step six: Cut the belly open carefully making sure not to cut the intestines. You want to just cut through the skin. When you get to the breast bone you will need a meat saw to finish cutting to the neck.

Carefully cut open the belly of the goat being diligent about not cutting any of the innards.

Carefully cut open the belly of the goat being diligent about not cutting any of the innards.

Step six: Begin to let some of the contents fall out of your way. Take the meat saw and cut through the pelvis. Grab a hold of the rectum with one hand and cut the anus away from the inside of the goat. Do not cut the intestine or rectum! Let the contents spill out of the cavity.

Open the belly up completely being careful not to let the innards begin to fall as the rectum will rip and spill fecal contents throughout the belly cavity.

Open the belly up completely being careful not to let the innards begin to fall as the rectum will rip and spill fecal contents throughout the belly cavity.

With a meat saw (or in my case my knife) cut through the breast bone right up to the neck.

With a meat saw (or in my case my knife) cut through the breast bone right up to the neck.

Cut through the pubic bone and around the anus so it can come free as you pull out the rectum along with the innards.

Cut through the pubic bone and around the anus so it can come free as you pull out the rectum along with the innards.

Step seven: Save the heart and liver. Cut the heart open and bleed it. Wash the liver and heart well and put in cold water until you can refrigerate them.

Cut open the heart and rinse the blood out of it.

Cut open the heart and rinse the blood out of it.

Step eight: Cut the esophagus and trachea away from the neck and throat area.

Esophagus and trachea removal.

Esophagus and trachea removal.

Goat carcass cut into two sides. We are not cutting off the extra fat before taking the meat to the butcher for hanging.

Goat carcass cut into two sides. We are not cutting off the extra fat before taking the meat to the butcher for hanging.

Step nine: With the meat saw, cut the carcass in half from tail to tip. You now have two sides of goat ready for hanging in a meat cooler. Wash them with clean water and hang for several days to cure.

As for how I’ll cook it? I’ll likely follow one of these tasty suggestions from Phelan of a Homesteading Neophyte!

81 Comments

Filed under Butchering, Educational, Food Security, How to..., personal food sovereignty

Butchering chickens (graphic photo documentary)

How to butcher chickens: a documentary in photographs

Warning: this is a graphic ‘how to’ photo essay on chicken dispatching and butchering, do not read any further unless you are really interested in learning the art of home butchery. Note these directions will work for turkey, chicken and ducks (and their wild cousins). See butchering turkey post for specifics on turkeys.

I was all set to butcher my Cornish Crosses this morning but they are still too skinny! So, instead I decided to butcher some of my larger roosters from last year. Although they are getting along fine with each other, I really do have too many of them. I am going to give one of my favourites away to the friend who lost all her chickens to the marauding bears in January. She has finally gotten herself another flock of gals who are in need of a beau. So, its the Pavarotti understudy who is the model for the accompanying photos. He was big and gorgeous but not new blood, so he has to go.

1. Step One: Preparing the work area.

Clean your work station so it is ready for the job.

Clean workstation ready for the task.

Clean workstation ready for the task.

Mine is about as simple an operation as anyone would want. Here is the list of equipment I work with:

a) An easy to clean table for the gutting and cleaning process (mine is a piece of smooth arbourite that sits on top of my table).

b) Block of wood for knocking the bird unconscious and killing cones to place the bird in to bleed out.

c) Knives sharp enough to do the job easily. I keep an assortment of sizes for different aspects of the job.

d) Plucking machine (not necessary, but helpful on the hands!)

e) Scalder and heat source: in my case is an old beer keg with an end cut off so I can fill it with water which sits on a metal stand so I can get a flame underneath it for heating the water. This is my newly acquired elaborate piece of equipment that is actually borrowed from someone who no longer uses it. Alternatively, place a metal container over an open fire will also work (see Poultry in Motion or Butchering Turkeys for examples).

f) Clean plastic or metal containers for rinsing the ‘keepables’ (heart, liver, gizzard, and neck) and cooling the birds after processing.

g) Various buckets for hand washing, collecting the guts and blood, towels for drying hands, cloths for wiping up, dish soap, running water.

2. Step Two: render the bird unconscious

Grab the bird by the feet then swing the bird over your head and swifty, and with force, bring its head down onto a hard surface so as to knock him unconscious. This is the first time I’m doing it this way since speaking with another farmer about how he kills his birds. He convinced me that it was worth trying. The idea is that you render it unconscious before slitting its jugular and therefore it is a more humane way of killing the bird than simply slitting it while fully conscious. Until today, I have always just slit them once in the killing cones. I must say, this method is preferable and there is a definite ease in dealing with them in the killing cones. When they are not unconscious, they can kick and fuss and even jump their way out of the cones after they are cut. This does not happen when the bird is unconscious. It made for a much more relaxed dispatch process in general.

Rendering the bird unconscious by hitting his head on the wooden board.

Rendering the bird unconscious by hitting his head on the wooden board.

A life defining moment:

I once saw Australian Aboriginal women do this with monitor lizards in the Outback. She drug it from its hole (after tracking it) by the tail and swung it overhead–exactly as I’m doing in the above photo–and brought its head down over a rock. It was shocking at first to see and yet my immediate thought was, ‘That is the kind of woman you need around if you’re ever in a pinch!” I was so impressed with those ladies that I thought, “I have to become one of those kind of women”. It’s taken a few years–not to mention a few tears–but I’m nearly there!

3. Step Three: killing the bird

Place the bird in the killing cone. Then, bring its head through the hole at the bottom. Have your knife ready (it will need to be very shard for chickens, especially roosters because they are heavily feathered in the neck region where you will need to cut). To locate the jugular vein, look at the chicken’s cheek. You will see it’s ear tuft of hair and jowl. The jugular is located at the edge of the cheek/jawline in line with its ear. Imagine the corner of your jaw and then look at the chickens jaw for the same point. Cut there. You will know that you have cut correctly when the blood spurts out of the neck. If it is slowly dribbling, you have not yet found the jugular–keep cutting. Repeat on both sides.

Grab the head and locate the jugular area before beginning your cut.

Grab the head and locate the jugular area before beginning your cut.

4.  Step four: Scalding

Put the bird in the scalder for several seconds and swish it in an up and down motion to allow the water to penetrate through the layers of feathers. The scalder water temperature should be at least 145 degrees F. Opinion varies widely on how hot the water should be. I make sure it is above 145F and no hotter than 170F. If it fluctuates between those temperatures, I don’t tend to worry about it. Simply take the heat source away from the water if it gets too hot. If you cover the scalder with a lid between birds the water will hold its temperature surprisingly well.

Chicken after several seconds of dunking in water scalder.

Chicken after several seconds of dunking in water scalder.

5. Step Five: Plucking the feathers.

Place the bird on the plucking machine. Gently roll it over from side to side so that all the body parts are eventually exposed to the plucker. Alternatively, place it on the table and start plucking by hand! Not all the feathers will come easily, some will have to be hand plucked even with the plucking machine.

The plucking machine saves my hands from a lot of tedious work!

The plucking machine saves my hands from a lot of tedious work!

Finishing touches of feather removal must be done by hand.

Finishing touches of feather removal must be done by hand.

6. Step Six: Remove lower legs.

Once you have the feathers off it is time to start the butchering process. Grab hold of the lower leg and bend it backward slightly. Take the knife and begin your cut at the joint. Cut through the cartilage and avoid cutting the bone. This makes the leg removal cleaner and easier.

Removing the lower leg.

Removing the lower leg.

7. Step Seven: Cut off the head.

Place your hand on the head, tilt the head back and sever between the head and neck. Once you have the meat cut all the way around the base of the head, you should be able to pull the head off. This is better than cutting through the bones in the neck as it leaved the chicken certainly clean of bone shards. Then, cut into the neck skin just below the top of the breast bone. Be careful not to cut into the flesh inside or the crop which is located in this throaty area.

8. Step Eight: Remove the crop.

Cut the skin all the way around the neck so it will be removable. You don’t have to cut as high up towards the breast as I have in order to get at the crop. If you want to retain more of the skin around the breast, then cut up from the neck towards the breast  (instead of from the breast down as I have in the photo) just enough to get your hand into the chest cavity. Pull the crop away from the chest cavity and locate its outlet that goes deep into the body. Then locate the esophagus which lays alongside the crop outlet. Cut both these tubes and remove them from their location. Gently pull the crop and the tubes out of the body and pull the neck skin along with it to remove it from the chicken entirely.

Carefully cutting into chest cavity.

Carefully cutting into chest cavity.

Locate the crop being careful not to cut it open.

Locate the crop being careful not to cut it open.

Carefully cut the crop away from the body cavity.

Carefully cut the crop away from the body cavity.

Note: I’ve taken too much of the skin around the breast away to make the perfect roasting bird. Luckily, this fellow is going to be made into Chicken Byriani by my friend from Hyderabad, India on Friday night so it is not a problem.

Pull the crop along with the neck skin down over the neck and off the bird.

Pull the crop along with the neck skin down over the neck and off the bird.

9. Step Nine: Gut removal

Cut into the stomach cavity below the breast bone and down towards the anus, being careful not to cut into the meat or the guts inside.  Cut down and around the anus. Gently pull the anus and colon away from the bird. Then place your hand inside the bird and pull the organs away from the cavity wall. Turn your hand from side to side to help dislodge the connective tissue. Grab hold of all that you can, including the lungs which are at the back of the bird, and pull it all out of the hole you’ve made. You can either toss all the guts away at this point (a bit of a waste of good nutritional value in the form of lost giblets), or clean the heart, liver and gizzard for use in the gravy and stuffing.

Carefully cut into stomach cavity of bird at base of breast bone.

Carefully cut into stomach cavity of bird at base of breast bone.

Cut towards the anus being careful not to cut through colon.

Cut towards the anus being careful not to cut through colon.

Here is the colon on the inside of the bird still attached to the now removed anus.

Here is the colon on the inside of the bird still attached to the now removed anus.

Gently pull the anus and colon out and away from the body of the bird.

Gently pull the anus and colon out and away from the body of the bird.

Place your hand inside stomach cavity and dislodge all the innards from the chest wall.

Place your hand inside stomach cavity and dislodge all the innards from the chest wall.

10. Step Ten: Prepare the giblets.

Cut the heart in half and wash in clean water. Cut the gal bladder from the liver and wash the liver. Cut open the gizzard and remove its contents then clean and wash it. Place the above in cool water.

The innards of the chicken: heart, lungs, liver, kidneys, gizzard, and intestines.

The innards of the chicken: heart, lungs, liver, kidneys, gizzard, and intestines.

Cut open the gizzard being careful not to cut through the inner sac.

Cut open the gizzard being careful not to cut through the inner sac.

Pull the inner sac away from the gizzard.

Pull the inner sac away from the gizzard.

The giblets cleaned and ready for packaging: neck, heart, liver, and gizzard.

The giblets cleaned and ready for packaging: neck, heart, liver, and gizzard.

11. Step Eleven: Remove oil sac:

At the base of the back just above the tail feathers is the oil sac. Place your knife above the sac and cut fairly deep into the skin. You want to go in and behind the two sacs and come out above the tail feathers but below the sac. In the photo below, you can see clearly a nub where a feather used to be. This is the base of the oil sac and where you want your cut to come out below.

Remove the oil sac at the base of the back above the tail.

Remove the oil sac at the base of the back above the tail.

12. Step Twelve: Prepare for storage

I always wrap the giblets in celophane and place them along with the neck into the body cavity as you would a turkey. This way the are available for use in gravies, curries, or stuffing. They add nutritional value to our lives that we are no longer getting in the form of organ meats thanks to our contemporary lifestyle of store-bought meat. Then I place the birds in zip-lock freezer bags and freeze if I’m not planning on using them right away.

The giblets are wraped in celophane and placed inside the bird along with the neck.

The giblets are wraped in celophane and placed inside the bird along with the neck.

The chicken weighs in at precisely 5 pounds.

The chicken weighs in at precisely 5 pounds.

102 Comments

Filed under Animal issues, Butchering, Chickens, Educational, How to..., Learning to Farm

When in Rome: eating local

Warning: some graphic butchering photos contained on this page.

I have always loved cooking (my grandmother thought I should have become a chef), but the thought of being stuck inside for my work and at such a repetitive, yet highly competitive, job put me off. As a consumer I’ve always loved trying foods from far off places. I’m the only one I know who can go to Mexico, eat like the locals, and gain weight! When I began studying for my Masters Degree in New Zealand, I had the opportunity to do fieldwork with the Aboriginal Australians. While it would have been an amazing opportunity, I eventually dismissed the idea–based on food choices. Being a ‘When in Rome’ kind of gal, I just couldn’t see myself eating grubs (and other traditional bug-type bush food), yet I knew I might have to if I spent months in the bush with the locals of Australia. Bush meat, however, doesn’t revolt me, and while in Australia I have eaten emu, kangaroo and some other ‘bush meat’.

Throughout my ‘worldly travels’, limited as they have been, I have drawn the line in gustatory adventures at bugs. I have seen grubs, grasshoppers, beetle larvae, cockroaches and ants as edible options on different menus, but the closest I ever came to venturing into the culinary arena of bug eating was while in Mexico. Living near Tepoztlan, I came upon a street vendor who cooked amazing traditional fare. One day,he was frying up a huge wok-like pot of chulapines (grasshoppers) and, lured by my trust in his chef-like prowess coupled with my ‘when in Rome’ philosophy, I nearly went for it. He was friendly, the food was obviously relished by others, they smelled tasty,  and I stood there overcome by the wrestling match between my mind and my gag-reflex. In the end I just couldn’t bring myself to try them. Thankfully none of the families I lived with depended upon them for their food, or I might have been forced to eat out of politeness.

When the chance presented itself to come and work with the Nuxalk of Bella Coola, BC,  I jumped at it. I would kill three birds with one stone: a trip home to visit my family that I’d not seen in nearly six years, a visit to my beloved Bella Coola again, an opportunity for my thesis fieldwork, and exotic food that I could cope with. The Nuxalk traditional diet would not encompass anything that repulsed me, or so I thought. Lots of the foods here I had never tried before, but thankfully none of the traditional foods came into the insect category. Living in Bella Coola during the past five years has afforded me the chance to eat all sorts of things I would not otherwise have the opportunity to try: moose, mountain goat, salmon roe, ut, traditional smoked and barbecued salmon (the Nuxalk way), ooligan fish and grease, sopallili (Indian ice cream made from a berry).  I have liked most things, and now much of the above list forms at least part of my diet. However, I have come to discover there are things I can’t get down my gullet without gagging, like ooligan oil and ut. The former is a thick grease they make by rendering down ooligan fish, while the latter is herring roe on kelp. The people go crazy for both items, sometimes travelling for 3000 kilometers round trip to get it (the ooligan run has been wiped out on the Bella Coola River, so they trade with other First Nations people far north of here for their beloved grease).

When a cougar was killed, I offered to help the taxidermist skin and butcher the cat. I had never done that sort of thing before and was pretty excited by the opportunity to learn a new skill. He planned to mount it for the hunter who tracked the cat with him. My friend the taxidermist was exhausted by the end and very thankful I’d been there to help speed up the process. Nevertheless, the job took us several hours late into the night.

The next day, his wife called me and reiterated their thanks for the help with the work. After some pleasantries she got to the point of her phone call: “Would you like a package of the meat?” With all the passion and knowledge of a food critic, she listed off all the merits of cougar meat and lard. She told me the story of how they’d hunted the cougars for years but had never used the meat or lard, and then by economic need, they finally tried it one year and have never looked back. Like nothing else on earth, cougar lard makes the best pastry, and there is no better recipe for cougar meat than stir fried with snowpeas and water chestnuts. I had heard about folks eating cougar here, but I had always turned down the opportunity to partake. Now that I’ve been up-close-and-personal with that cougar in particular, the social qualms I harboured have withered. Once it was all gutted our and laying there, it barely looked any different from a pig–nice, clean, white flesh. With my friend nearly drooling into the phone while spouting off the recipe I reconsidered my position and answered, “Sure I’d like a package.”

Keeping in mind the immense popularity of Vancouverites Alisa Smith and James MacKinnon’s best selling book, 100 Mile Diet, who was I to turn down such an interesting example of local food as cougar, when the offer arose? Where else in the world would I get the opportunity to try this? Suddenly I could see economic development possibilities for our community. I envisioned a highly specialized tourist industry burgeoning around local foods, with high end restaurants sprouting up to cater to a tourist elite who would fly in from far off places (just as our Heli-skiers do) to try the wonders of our local cuisine: Bella Coola Beaver, Grizzly Bear Stroganoff, and the founding specialty, Stir-fried Cougar with Water-chestnuts and Snow Peas!

I have yet to pick the package up or try cooking it, but will keep you posted when I do!

Cougar ready for back cut skinning.

Cougar ready for back cut skinning.

Sorry the images are not clearer, it was late and the lighting not great!

Back splitting of cougar begins at the tail.

Back splitting of cougar begins at the tail.

When a taxidermist field dresses and butchers an animal, they use a back-split technique in order to preserve the skin’s integrity and make it easier to put back together. If you are not going to use the skin for tanning or mounting purposes, this is unnecessary.

Peeling the cougar out of his skin. This is coming around under his fore shoulder and elbow.

Peeling the cougar out of his skin. This is coming around under his fore shoulder and elbow.

Once the skin is off, then the normal butchering process begins. From this point on, it looks like any other animal ready for processing.

Opening the belly, just like you would a turkey!

Opening the belly, just like you would a turkey!

If I had not participated in this whole process, I may have been unable to think of cougar as game meat–not anymore!

6 Comments

Filed under Animal issues, Butchering, Cougars, Funny stories, Hunting, Locavore, Politicking with predators

Butchering days are over!

Three of the four turkeys I butchered yesterday.

Three of the four turkeys I butchered yesterday out and about on their final free range day. They were checking out the Christmas lights hubby had put on the barn.

Yesterday, with the help of my friend Clarence, I finished butchering the last of my turkeys. Clarence, who grew up on a farm and has continued to keep animals his whole 83 years of life, had never seen, let alone tried, a poultry plucker. When I told him about the one I’d borrowed, and what a great time I was having with it, he asked me to let him know the next time I was butchering so he could come over, lend a helping hand, and give it a whirl at the same time. Having learned so much from Clarence over the past couple of years, I was thrilled to be able to pass on some knowledge to him, for a change.

Before I lit the fire yesterday, I left him a message on his answering machine letting him know I was butchering today. I had just gotten the scalding water temperature up to where I wanted it, had hung and was cutting my first turkey, when Clarence appeared at my gate. “Don’t you just have the perfect timing!” I called out when I saw him, quickly finished the cuts on the turkey’s neck, rinsed my hands and, wiping them dry on my pants, made my way over to greet him.

Clarence never brings his truck into the yard but prefers to stop at my gate and walk in. He talks to all the critters on his way towards the house, calling out as he goes, ‘Hello goats, hey there duckies, how ya doing doggy,’ meeting and greeting his way up the driveway. There is often a chorus of replies: ‘mmm-baaaa, quack-quack-quack, gobble-gobble’. What is always absent is Tui the dog’s bark, which impresses Clarence to no end.  He takes this to show how intelligent she is. “You know my dear, she never barks at me,” he happily reports as if for the first time on nearly every one of his visits. “She knows me… you know… knows my voice.” He rounds out the thought with a final affirmative “Mm-hmm.”

Today, he had brought a big beef rib bone for Tui. He’d already given it to her when I’d spotted him, and she was happily trotting back down the driveway, head cocked to one side with the weight of the bone, balancing herself as she made her way back to her spot on the grass where she flopped down and started to work greedily. The bone must have been about twenty inches long. With the prize between her teeth and her paws, her Christmas had come early.

As I drew closer to him I was not greeted by the usual, ‘Hello my dear,’ but “Are your hands bloody?” Well, that’s not a question I’d ever thought I’d hear aimed at me, I thought, and stuck my freshly rinsed hands out for him to inspect. His eyes cast down searching for the answer instead of waiting for my reply. Then, clutching my hands in his and looking them over with care, he triumphantly declared, “Yep, they’re bloody,” pointing to a spot of blood on my ring finger that I’d missed. “OK, I’m satisfied,” he said, dropping my hands and continuing his march towards the barn where I had my butchering station set up.

Then, out of the corner of his eye, spotting something that he couldn’t ignore, he veered quickly off course towards the hung turkey: “Oh, my dear, you haven’t got him… her, cut well enough on the right.” Without pause, he took out his knife and expertly finished the job that I had rushed through in order to meet him a few moments before. I was surprised at how good his eyesight still is at his age, and impressed at how quickly he judged the situation and worked deftly to rectify it. One thing I’ve learned about Clarence is that he hates to see an animal suffer. While he is happy to teach these difficult skills, he’s also quick to finish the job if it is not done right soon enough.

For the rest of the day, we worked steadily together, taking turns at catching the turkeys and scalding them. He asked that I show him how to use the plucker with the first turkey. Suitably impressed and eager to try it out, he did the next one. “Wow, this sure works, my dear!” he called out over the whir of the plucker as he laid his first bird on the rubber spokes, his eyes widening in surprise as he watched the feathers fly off the bird. I looked over to see the result of his newly learned skill, and, in a momentary lapse of concentration–so excited about communicating his wonder at the job the plucker was doing–he nearly lost the bird to the grip of the plucker. “Wow, you see that?” he said, quickly turning to catch hold of the fluttering bird and recover his grip. As he regained his composure he laughed, “You ever drop one of these?” (For those of you who want the answer, click Poultry in motion.)

I let him do all the plucking today, as I could see he was interested in the machine. “Did anyone tell you that I’m taking you for lunch today?” he asked, one hand on the neck and the other on the feet of the turkey, the wet corpse sagging heavily between them still steaming from the scalding water, mist rising up around Clarence like a scene in a B horror movie.   “No,” I replied, looking over at him as the mist evaporated: ‘Elmer Fudd butchers his first turkey,’ I thought to myself.

It’s what I love about Clarence. He’s is such a character, he is almost a living caricature of himself: red and white quilted plaid jacket, buttoned down shirt, blue-jeans, Gortex hunting boots, completed by his green, Elmer Fudd hunting hat–replete with permanent cougar teeth marks from his attack 10 years ago. It’s his ‘Signature Collection’ line of clothing. You could take a photo of him today and, by digitally changing the background scenery, make it true for any season: here’s Clarence in the winter, here’s Clarence in the spring, here’s Clarence in the summer, and here’s Clarence in the fall. The only thing that would be altered to indicate the changing season is what he is wielding in his hands: in spring a seed catalogue, in summer a shovel or pitchfork, in fall a rifle, and in winter a snow-shovel. Yet Clarence’s simple taste is enchanting (the more so because he is unaware of it): underneath he is real, unassuming, and one of the most humble people I’ve ever met–not a pretentious bone in his body.

Having cut and plucked our way through the four turkeys, I ask him if he would mind if I added a couple of roosters. “No better time than now, my dear,” he hand-gestured to all the butchering paraphernalia about us. I’d been keeping the extra roosters partly because they are really pretty, but primarily because I like to let my hens (and thus my flock) ‘do their thing’ when the desire suits them to go broody (the technical term for motherly). For a lot of my time here at the farm, I have relied mostly on the hens to increase the numbers in my flock, supplemented occasionally by my feeble attempts at incubating eggs. It was only this past summer, after a miserable hatch rate (both mine and the hens’),  that I resorted to buying in some stock.

With the four turkeys done and on the table cooling, I looked at the roosters and began mentally weighing them. I want to cull out the smallest and keep the heaviest for breeding stock. I’m trying to develop my flock into good, all-purpose egg and meat birds–those who watch their figures get the knife around here. I spotted the two I thought were the smallest, caught them with my fishing net and brought them over to the hanging tree.

“Can you do this one, Clarence?” I asked, holding up one of the most beautiful roosters I have for him to see. “He’s just too pretty, I can’t do it.” I had been wanting to keep the reamining roosters: the Magnificent Seven I called them. I had grown quite fond of them and these two even had individual names. I still struggle with the ones that have names. Of course, once they were cut I was fine and did the rest of the processing, minus the plucker step, which Clarence was pretty thrilled with operating at this stage. I was also concerned that my knife wouldn’t do a quick enough job of the roosters. These ones in particular had glorious manes and, after doing in a bunch of turkeys that have no feathers on the neck, I knew my knife wasn’t sharp enough to get through all those feathers. I was relieved when Clarence obliged me.

Finally, as we were doing the final clean-up of the area, he touched my arm gently and said, “Awe, I’m glad you got all that work behind you.”  Throwing the last of the feathers on the fire he asked, “You ready to go for lunch now?” I rinsed the table-top and cutting board with soap and water, covered the blood up deep with sawdust, stacked the buckets and other items away in their place and carried the birds over to the garage. Clarence tipped out the scalding water and tidied up the fire and plucker mess. Once done, we headed into town for a hot lunch. It was a lot closer to dinner time than lunch by the time we were done, but it tasted good nonetheless! It is amazing how good a hot meal feels after a day out working in the cold weather, and I said so as I thanked Clarence for lunch.

7 Comments

Filed under Butchering, Chickens, Turkeys