Category Archives: Vegetable gardening

Making bears and fruit trees get along

I’ve recently been involved in a discussion with the BC Food Systems Network about the relationship between bears and food security. In terms of food security, this issue is an extremely important one for anyone living where large predators exist. I plan to write about it over several posts in order to dispel some common misconceptions about the human-predator relationship in terms of food security, and to propose some practical solutions.

Please feel free to voice your opinions in the comments section. I welcome the input, as it gives us all a chance to talk about this important issue. Your comments also provide me with food for thought, and the chance to develop my ideas.

How to make bears and fruit trees get along

A member of the BC Food Systems Network recently wrote about their community’s experience with the Conservation Service. According to this source, the COs in their area, instead of dealing effectively with any nuisance bears, are threatening people with fines if they don’t cut down their fruit and nut trees. While outraged with this Ministry’s attitude, I’m not surprised by it. Here in the Bella Coola Valley, too, people are being advised to cut down their fruit trees by the Conservation Service, instead of being offered support, protection (part of their motto!), and–oh, yes–conservation.

False belief #1: The ‘remove the attractant’ theory

In terms of food security, the idea that we must ‘remove all attractants’ to prevent bears from entering our communities is a dangerous line of thinking (particularly in light of our economic times). The logic may sound reasonable when you are living in the city and dealing with a bear in your garbage can. However, it is not consistent with the goals of food security, because in rural BC there is no limit to the list of attractants. Therefore, we cannot have food security in our communities and be consistent with these Ministry guidelines.

Most specifically, and to put it simply:  if we ascribe to the notion that humans can control bear behaviour by ‘removing the attractants’, then we cannot raise food. Fruit trees, berry bushes, carrots, and parsley all attract grizzly bears. Chickens, ducks, sheep, goats, and rabbits, all attract grizzly bears. The duck feed, the goat feed, and the chickens’ corn all attract grizzly bears. Fields of corn and oats attract bears. Beehives attract bears. (Many of the above also attract a host of other predators that threaten our food security, such as eagles, foxes, wolves, cougars, mice, owls, hawks, martin, weevils, and so on.)

If we are to be consistent with the ‘remove the attractant’ theory, then the next ‘logical’ step is to pass public policy laws that forbid people from raising their own food. In order to ‘remove all the attractants’ we will have to cut down all the fruit trees, plant no vegetable or herb gardens, and get rid of all the feed and grain for our agricultural animals–chickens (see Needless Suffering), ducks, geese, goats, pigs, turkeys, sheep, and so on–lest we be seen to be ‘baiting’ the bears. Instead, maybe we could free range our agricultural animals? No.  To be consistent with the ‘non-attractant theory’ we must leave it to the corporate agricultural producers who can afford (both ethically and financially) to keep animals indoors, behind Fort Knox type fenced areas, or on feedlots.

New Jersey Example

The idea of removing the attractants simply doesn’t work. This line of thinking got the state of New Jersey into its conundrum with their bears. They have gone a long way down this path, having made city wide efforts of removing the ‘attractants’ from their city streets and neighbourhoods. They have made huge efforts to limit the times in which garbage could be out on the street for collection, and even made centralized collection stations. Nevertheless, despite the fact they have removed all the so called ‘attractants’, bears have NOT stopped coming into people’s yards. Now accustomed to viewing human settlements as good food sources, bears are now entering houses. We should learn from their experience instead of continuing down the same path.

If we are going to have, and support, real food security in our province, we have to change the way we look at this problem. If not, then we will eventually lose the right to keep fruit trees, grow gardens, and raise animals for food. The evidence of this is revealed in the current attitude of British Columbia’s Conservation Service Officers.

Living under siege

The idea that humans are responsible to not ‘attract’ the bears is ridiculous. Humans have always grown gardens, had fruit trees, and domesticated animals in places where large predators roamed. Since humans have been on earth they have been in direct competition with other large predators for their food (livelihood) and, by shooting, trapping, snaring, or other aggressive measures, have trained these wild animals not to intrude into their human settlements. Until very recently, we have known and understood our relationship with the natural world; part of our role was teaching wildlife what is appropriate behaviour. We have lost that understanding now that most of us buy food from the grocery store, agricultural production is out of sight and out of mind, and the closest we get to a grizzly bear is by watching the Discovery Channel,

It is time to re-educate ourselves to re-educate the bears. Even the Conservation Officer Service acknowledges that humans  can ‘teach bears bad habits’, so why not teach them some good ones?

To view the series of posts on this topic, see:

Part two

Part three

Part four

13 Comments

Filed under Agriforestry, Animal issues, Bears, Conservation, Educational, Ethical farming, Food Security, Food Sovereignty, Fruit Trees, personal food sovereignty, Politicking with predators, Politics of Food, Sustainable Farming, Vegetable gardening

For the love of a sprinkler

Over the past several years, I have been on the hunt for a decent sprinkler. I started out my gardening career innocently believing that I could just go to the hardware store, buy a sprinkler, bring it home, set it up, and viola, it would work. Not so. I have tried what seems to be every sprinkler on the market and been disillusioned with each and every one of them. In my quest to find one that would work, I have tried seemingly everything on the market: backyard sprinklers, lawn sprinklers, environmentally friendly sprinklers, back-n-forths, round-abouts, heart shaped, bird shaped, free standing sprinklers, stick in the ground sprinklers, stick on a pole sprinklers, even a whirly-gig type sprinkler. Most of them work for a couple/few weeks and then they start getting fussy if not downright useless.

At first, they need a little knock to get them jump started. Then, they move on to the stage of needing readjusting: a little tick here, a wee nudge there, a slight click-clock to realign their plastic parts. Eventually, I’m reduced to taking them completely apart in search of some miracle. I find I’m out there with them adjusting and fiddling long enough that I may as well be hand watering for the time it takes to get these fuss-budgets working. Is there not enough water pressure to keep them moving? Are they clogged? Do they need lubrication? Has a vital plastic bit broken off? I have taking them apart to see if they are clogged, I have lubricated the heck out of them, I have even turned off all other water sources to try to solve the problem.

Just about every fiddle has worked for a few days–if I’m lucky–and sometimes only long enough for me to be satisfied (fooled) into thinking I’ve at last found their ‘sweet spot’ only to come back twenty minutes later–with aspirations of moving them–to find them deeply involved in an earthworks project in the middle of a newly seeded veggie plot.

I don’t recall this problem from my youth. I recall my mother setting up the sprinkler in the yard for a bunch of my friends to come over and play during a hot summer day. Running and jumping through the sprinkler kept us kids entertained for hours. The sprinklers of my youth worked long hard hours for their living. Never do I remember them stopping, getting stuck, or clogged or being generally fussy as the sprinklers of today–and those sprinklers took some abuse! I remember stepping on them, knocking them over, and tripping over them in the quest to stay cool and beat someone else through the rainbow of artificial–yet uninterpretable–rain.

I’ve asked my neighbour about the sprinkler situation and she concurs with me: they don’t make em’ like they used to! She scours garage sales for the ‘old fashioned metal back-n-forth’ type of my childhood past. She also claims that the heavy duty metal ones that go in a circle and back on themselves in a ch-ch-ch-ch-ch-ch-ch-brrrrrrrrrrrrrrrrrrrrrrrr, ch-ch-ch-ch-ch-brrrrrrrrrrrrrrrrrrrrr fashion are keepers. In lieu of finding any of the above at garage sales (mostly due to the fact my neighbour treats garage sales like the breath of life itself and beats me to the ‘good stuff’ every time), I’ve bought the present day reproductions of these types only to be disappointed to date.

Last summer, I thought I finally had the answer. My husband went to Vancouver and took up the challenge of finding the fool-proof sprinkler: he brought home two different kinds, and two of the ‘guaranteed to satisfy’ kind. Here was the answer to my watering problems and for the rest of last summer they worked. They are the back-n-forth type, made of plastic, adjustable in the width of the spray coverage and also the depth. I was thrilled and relieved–until this morning. We’ve not had rain now for a few weeks and my garden is in dire need of a good showering. I set the sprinklers up this morning in hopes of quelling the veggie patch’s thirst. However, twenty minutes after setting them up, I was aghast to find one of them stuck in one position and a small farmer’s dugout developing in the middle of the strawberry patch! Ugh.

2 Comments

Filed under Vegetable gardening

Special features

Conversation with the writer/director of ‘With a Little Help From My Friends’

My ‘David Suzuki Digs My Garden’ audition video is–hallelujah–in the can. I would like to thank my cast and crew who worked tirelessly to get this done: David, Nick, Pavarotti, Elvis, Tui, Gordon, Malcolm, Fatty-Fat, Shiraz, Sundown, Coco, The Girls, and Martha. If I have missed anyone just tell me at next feeding time and I’ll add you to the list. Most of all I’d like to thank my ‘Best Boy’, Ahmed, who ransacked Vancouver in order that my production values were top notch, and my ‘Sound Engineer’, Buddy Thatcher. Thankfully, I saved on money by doing the location scouting, casting, catering, writing and directing myself, and the fact that the actors were willing to work for not quite peanuts–but close–helped keep us within budget. It was a very happy set except whenever I mentioned the word pesticide.

Although this was my first feature film, I found the whole experience so creatively stimulating, that I’m thinking of expanding into more short films to document my life and work here. I have spent this past year writing words and am now intrigued to write scripts and story-boards for this visual medium.

9 Comments

Filed under Animal issues, Educational, Ethical farming, Goats, Horses, Just for fun, Preserving the harvest, Sustainable Farming, Vegetable gardening

David Suzuki Digs My Garden

SuzukiGnomeVancouver’s most famous Environmentalist, David Suzuki, is running a contest for pesticide free gardeners this summer. They say you don’t have to be a master gardener to play a starring role in the ‘David Suzuki Digs My Garden’ contest. They want a passionate storyteller who believes pesticide-free growing is the way of the future–which needless to say I do–that they can follow this summer in video, pictures and print, from soil prep and composting, through seeding and weeding, to reaping the harvest.

Without hesitating, I filled in the contest form on Thursday night and promptly went to bed. On Friday, I received an email saying I was accepted to the second phase, the video audition. How exciting! There are, of course, many problems with this: I don’t have a video camera, I don’t know anyone with a video camera, I haven’t ever used a video camera, I live 500 kilometers from the nearest store with a video camera, and no, I can’t buy one over the phone from the Vancouver camera stores. Consequently, I spent Saturday hunting down some options and finally a friend in Vancouver came to my rescue. He bought the camera and put it on the plane to Bella Coola this morning.

It arrived at 1:30 pm. I have since then been reading the instruction booklet whilst charging its batteries. I’ve managed to write my script and practice it twice on an old tape-style video camera (that won’t let me translate it to an AVI file so I can upload it to You-tube as the Suzuki Foundation requests) and hone it down to about 90 seconds. Now, I’ve gotten half way through what was going to be my final take–on the newly charged fancy digital jet-lagged camera–and I’ve hit something that has made the whole thing mute, and can’t figure out how to undo it!!! It will be a miracle if I manage to get this completed by Wednesday night! Wish me luck.

If I successfully manage my way out of the nanotechnology quagmire I’ve waded into, I’ll put it up on the blog for all to see. In the meantime, you can view Suzuki’s just over one minute promo video by clicking here.

4 Comments

Filed under Developing Community, Just for fun, Sustainable Farming, Vegetable gardening

Howling Duck Ranch’s own peas, pea soup

Dried Alaska peas for seed and soup.

Dried Alaska peas for seed and soup.

This year, in the attempt to achieve ‘Personal Food Sovereignty’, I decided to experiment with some legumes. I grew (or rather, attempted to grow) the main legumes we like to eat in general, and generally eat often.

Thus, I attempted to grow the following with varying degrees of success: lentils, cannelli beans, black turtle beans, garbanzo beans, broad beans, pinto beans, soya beans, and adzuki beans.

Attempting to become sovereign in legumes turned out to be an extremely educational experience: an utter failure on the one hand and a completely enlightening experience on the other. Not only were most crops a definite failure, (several varieties  barely made their presence known in the garden thanks to their penchant for warmer climes), but also of those that tried to participate in the project–through sheer will and determination–didn’t go the distance. They simply didn’t make it to the dry shell out stage of maturation before the rotting rains of our fall pounded them into a pulpy mess.

Despite the miserable failures, there were several key learning points along the way: I learned the growth pattern of lentils and, thus, why I won’t attempt to grow them again–too small, too difficult to hand thresh,  too little food value return for the work involved. I also learned which ones I will try  again next year, for example, black beans, but not for its dried shell out possibilities but rather to eat at the green stage–they are extraordinarily yummy as a green bean.

Peas laid out on my kitchen table drying.

Peas laid out on my kitchen table drying.

I did  have great success with was my Alaska pea crop. Upon realizing that most of the legumes I was experimenting with were simply not going to amount to much, I summoned the peas and insisted they rise to the occasion. I was planning to let some go to seed anyway, and already had enlisted a few exceptional plants–marking them for seed saving purposes for next year’s crop.

I had not been able to find any information on the subject of letting the regular garden peas going to the dried stage for soup and dahl making purposes, but throwing caution to the wind I decided, ‘why not?’

Another reason I decided to let some of the regular fresh pea crop go to the dry shell out stage was that the food value relationship versus time must be better at the dry shell out stage. It occurred to me one day while harvesting the fresh Alaska peas for dinner, I was conscious of just how long it was taking to get enough for two for dinner–a long time! So, I rationalized, considering it takes just as much time to shell out fresh as it does the dried, but as a dry bean, the protein and carbohydrate value has increased significantly, why not  let these peas turn into legumes? They may not be the right pea for habitant pea soup, but in terms of local eating, food security, self-provisioning, etc., they would have to do!

Here is the recipe I developed for my own pea soup peas!

Howling Duck Ranch’s Own Peas, Pea Soup

3 tbsp Olive oil (but any oil will do, and if I had access to beef or pork tallow/lard, I would use that).

1 large onion

1/2 cup diced carrots

1/2 cup diced zucchini

3 garlic cloves, sliced thin

salt, to taste

fresh ground pepper, to taste

Herbs to taste: thyme, savory, sage, parsley, oregano

Spices to taste: allspice (if using, cut back on pepper)

3 cups dried peas (soaked in 6-8 cups of water for several hours)

More water as needed for cooking soup

Soup stock: ideally use boiled salt pork or a ham hock.

If you don’t have access to salt pork then substitute with one of the following: ham flavoured stock, or bouillon cube, or home made stock from pork bones (in a pinch, I have even cooked bacon and used the drippings as the stock base), you can also make it vegetarian if you wish.

Directions:

Caramelize the the veggies, cooking the onion first in oil, then carrot, garlic and zucchini. Add salt and pepper, and cook until veggies are soft. Add the soaked but drained peas, pour in enough water and stock to cover by an inch. bring to a boil. After bringing the peas to a steady boil, turn the heat off and cover for 10 minutes.

At this point, you can transfer the whole pot to a slow cooker and cook on low for 6-8 hours. Alternatively, keep boiling the soup until the peas turn to mush. Add desired herbs and spices, adjust salt and pepper to taste.

This soup demands to be dipped and dredged, so serve it with good, hearty, home made bread.

13 Comments

Filed under Food Security, How to..., Preserving the harvest, Sustainable Farming, Vegetable gardening

Gone are the days…

...when I will take a jar of spaghetti sauce for granted.

Yesterday I spent more than 16 hours in the kitchen dealing with tomatoes (and there were about 4 hours the previous day donated to tomato prep). Because I didn’t have a harvest of tomatoes to speak of, but knowing I didn’t want to live without spaghetti sauce for the winter, a friend and I decided to buy 150 lbs of tomatoes from our sole supermarket, and make salsa and spaghetti sauce together. The friend got waylaid an extra couple of days and some of the tomatoes began to go off. Over the weekend, I threw the worst of them out and put up the-ones-that-couldn’t-wait by myself: drying, roasting and making lasagna with on-the-spot-sauce. I got through about 20 lbs.

Over the course of the weekend, I managed to prepare for saucing another thirty pounds of the tomatoes: blanching, peeling, coring, chopping and otherwise getting ready for saucing. Yesterday, at 8:00 am in the morning, I began cooking the prepared tomatoes. While they were boiling, as it was my ‘maiden voyage’ into the land of Back-to-Basics food strainer and sauce maker, I read the instructions, put it together, and began saucing the cooked tomatoes.

My friend joined me at about 10:30 am, to take over the saucing job while I set to making the rest of the first pot of spaghetti sauce: washing, chopping, slicing, dicing and then sauteing the veggies. Once we got the first pot on the stove, we set to dealing with the other three, 25 pound cases of tomatoes: wash, blanch, peel, core, slice, boil, strain through saucing contraption.

Several hours later, with two pots of spaghetti sauce on the boil and reducing on the stove, we had come full circle and were once again facing the last box and a half of tomatoes: blanch, chop, core, slice, blanch, chop, core, slice, breathe in, breathe out, blanch, chop, core, slice, etc. These last boxes were to be made into salsa, so the saucing step was gratefully omitted.

By 8:30 pm, I was exhausted and we still had not started the canning process. My friend made two double batches of the salsa mixture, still uncooked, put it in to pots and went home to finish the processing job herself. Meanwhile, I put a double batch of salsa on to boil and turned back to the spaghetti sauce, which was finally reduced enough to be transferred to jars and processed in the pressure canner.

Fast forward to midnight: I had one lot of spaghetti sauce processed and one double batch of salsa water-bath canned, all now cooling on the counter. The second lot of spaghetti sauce, sufficiently reduce finally, was still waiting to be processed; so I put it in the pressure canner and put the timer on the stove. At 3:00 am (when the canner had cooled sufficiently to be opened), I took the second batch out and set it on the counter beside the other batch. I did manage to sleep between midnight and 3am, on the couch, hands still on fire from the mountains of jalapeno pepper chopping. Mental note to self: use gloves next time!

This morning, I still have a single batch of salsa in the fridge waiting to be cooked and canned, and the dehydrator is still working away noisily on the kitchen table. However, the uncooked salsa has been put on the proverbial ‘back burner’ because I’ve had to deal with the fresh milk from Sunday (pasteurize and turn into cheese because I still have enough yogurt from last week), and get ready for a group of high school children coming to tour the farm at 11am. They are eager to see the animals and want to pet a goat or maybe catch a chicken.

Tally-oh

All up, I have seven 750 ml jars of spaghetti sauce (and seven for my friend) and eight 650 ml jars of salsa sitting on my counter (she will have the equivalent), and I still have to process 3 more jars of salsa.  In addition, I have 3 quart jars of dehydrated ‘sun-dried’ tomatoes, and two quart jars of slow roasted tomatoes in olive oil in the fridge. I have made one batch of fresh spaghetti sauce that I used to make lasagna and… that’s it: the grand total of what 150 pounds of tomatoes is reduced to!

Economics

So. The 30 lbs of tomatoes turned into seven 750 ml jars of spaghetti sauce. The tomatoes cost me nearly $1.00/lb, so when you look at paying $3-4.00 per jar of fancy spaghetti sauce at the store, those 7 jars on my counter are only ‘worth’ $21-28.00 yet I spent $30 on the ingredients; so I haven’t broken even in the economic sense, and I have not yet considered the cost of the other ingredients, or the propane used in the cooking process–let alone the hours of labour put in to the job!

Conclusions

As I look at my seven beautiful jars of spaghetti sauce and contemplate what it would take to grow sufficient tomatoes to keep us in sauce alone, I’m overwhelmed. Not only do I probably not have enough land to do the job, nor the growing conditions where I live to produce decent tomatoes; I certainly don’t have the energy to keep that kind of canning marathon up in order to look after our  tomato sauce needs for a year, year in year out.

10 Comments

Filed under Food Security, Preserving the harvest, Sustainable Farming, Vegetable gardening

The end of composting…

as I know it!

September 21st, it was the last day of summer and I was down at my friend Clarence’s garden helping him harvest some potatoes. I had been by his place a few days before while he was harvesting some fingerling potatoes. He was unsure of whether or not he was going to bother with them. “I had these in my garden years ago but got rid of them,” he told me, “but now they’re back.” He shrugged, as if the potatoes had decided on their own to re-colonize his garden.

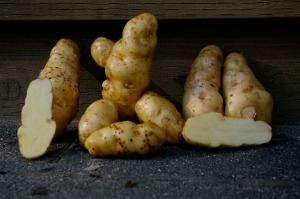
Some of Clarence's Ozette potatoes sitting on my porch; notice the knobbly one in the centre, that's all one potato!

Some of Clarence's Ozette potatoes. Note the one in the centre, that's all one potato!

Today I was back to help harvest the tasty little beauties. (I also wanted to ensure I would have the seed for next year.) After searching through various web sites and photos of potato varieties, I found not only the pedigree of Clarence’s ‘Indian’ potato but also the reason behind the name. The original seed was obtained from Anna Cheeka, a Makah Indian of the Neah Bay Tribe, and introduced to the market by David Ronniger, of Ronniger Potato Farm LLC, in the late 1980s. According to their web site:

The Ozette is one of the tastiest of all fingerlings. Classic in appearance with pale gold skin and creamy yellow flesh. The slightly earthy, nutty flavor comes through beautifully when lightly steamed or sautéed. Late variety.

See Potato party for one for more on the Ozette potato.

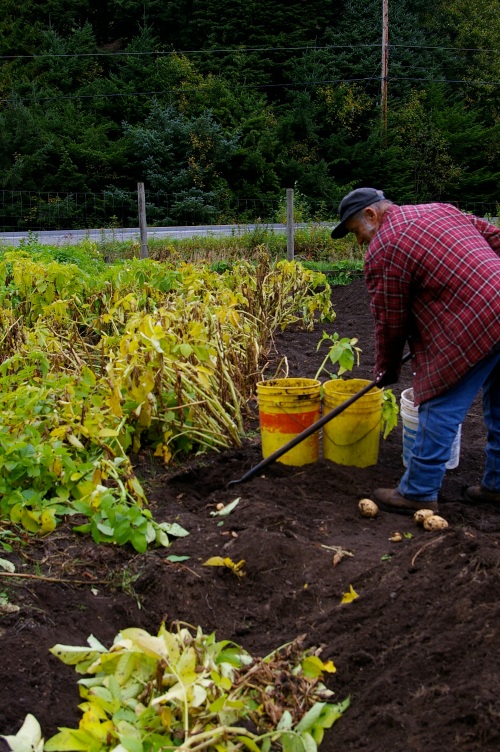
While in Clarence’s garden, I noticed he was doing something foreign to me: placing the potato tops and any rogue weeds back into the hole where the harvested potatoes had come from. Having just harvested all of my potatoes and carried the potato tops, along with the weeds, to a compost pile inside my garden, I asked him about it. “I’ve always done it this way” he said, and then shrugging, “It’s what my dad taught me.” By spring, it would be rich soil, while my compost may not be completely biodegraded. “It feeds the worms too” he added as an afterthought.

While digging potatoes, he uses the tops as back-fill to be composted directly into the soil

While digging potatoes, he uses the tops as back-fill to be composted directly into the soil.

I had thought that I was being clever by having the compost pile inside the garden, saving myself two steps: heaving the weeds and garden waste out to the pile, and then heaving it all back again in the spring as composted material. In the spring, I would simply spread it around the garden here and there and then turn the chickens in to do the rest of the spreading work. But what Clarence was doing eliminated both steps and produced a better result.

“You know, that soil scientist who was here last year? He told me I had the best soil in all the tests he’d done in the valley,” Clarence boasted while picking out a small rock as he continued to dig the potatoes.

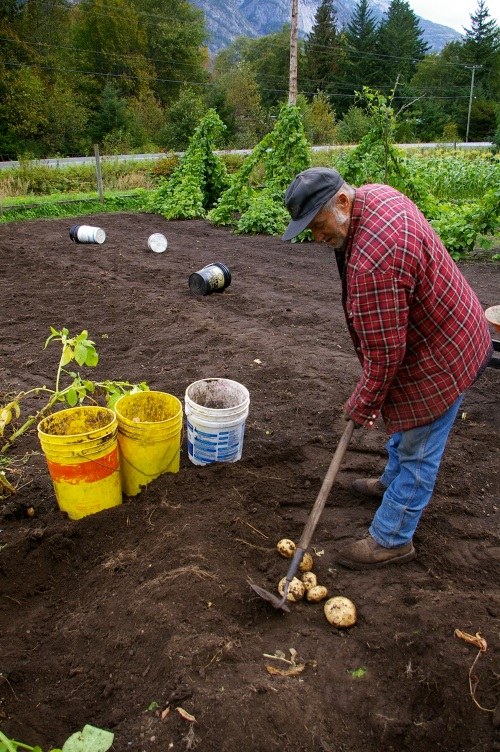
one for keepers, one for rogues, one for rocks.

The three-bucket system: one for keepers, one for rogues, one for rocks.

This man has a system. A three-bucket system: One bucket for the ‘keepers’, one for the ‘rogues’, and one for the rocks. The keepers he stores enough for his family and sells the extras, the rogues he gives away to those who can’t afford to buy, and the rocks he disposes of. He’s been maintaining this system in this garden for longer than I’ve been alive. “You know, people say their gardens are too rocky for vegetables” he says while continuing to hoe, “So I ask them, Have you ever thought about digging them out?” He goes on to tell me about the thousands of rocks, small and large, that he’s taken out of here over the years. One of them was too large for removal he tells me, “So I spent nearly two hours digging a hole beside it …you know, and tipped it in” he stops hoeing long enough to give me a visual aid in gestures, and then nods towards an area in the garden, “It’s still in there, under the soil deep enough for my rototiller to pass over unscathed.”

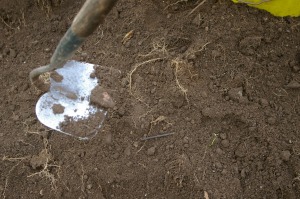
Diligence with roguing out even small rocks has made the soil what it is today.

Diligence with rouging out even the smallest of rocks has helped make the soil what it is today.

Clarence is eighty-three. Originally from Pennsylvania, he is now a great-grandfather several times over. He has outlived his wife (but enjoyed a fiftieth wedding anniversary); survived the deaths of two children; endured 295 days as a POW “guest of Mr Hitler” as he likes to put it; lost his thumb end to a dynamite mishap at the tender age of 5; hunted countless troublesome cougars, and even got the better of one which attacked him on January 24th, 2000 (when he was seventy-four!). Luckily for me, he is also a master gardener keen to pass on his knowledge.

Like the Ozette potato, Clarence came north when young and flourished in a new climate. He too is a master survivor. No wonder he’s got the best soil in the valley!

4 Comments

Filed under How to..., Potatoes, Sustainable Farming, Vegetable gardening

Sauerkraut (recipe below)

Sauerkraut in crocks will ferment for 4-6 weeks.

Sauerkraut in crocks will ferment for 4-6 weeks.

Six weeks ago the ‘other two-thirds’ (OTT) and I harvested our cabbages and spent a couple hours shredding, salting, pounding and layering it all into crocks. We then sat it in the corner of the kitchen and forgot about it. Now, it has been transformed into sauerkraut, and I have spent the better half of the day–without the aid of the OTT–canning it. Three big crocks makes a whole lot of sauerkraut. It is now nearly 4:00 pm and I’m still canning, and I’ve been at it now for a few hours. The good news is, I have friends that like it so I’ll give a bunch of it away as gifts. The bad news is, there is still another crock to deal with sometime later this week!

Actually, it is all good. It is a lot of work, but useful work, real work. Not only that; it is tasty work. I never liked sauerkraut until I made it the first time. It is amazing the difference it makes when you not only make it yourself, but also grow the cabbage that you make it from. Home grown cabbage is nothing like the hard, bitter, wax-laden ball that you buy in the store. When you grow your own cabbage, you are introduced to a completely different vegetable: they are sweet, crisp, crunchy, and they squeak.

Not until I grew my own could I eat cabbage that wasn’t drenched in mayonnaise and vinegar, and disguised by a whole host of spices. The ones you grow are crisp, sweet, and smell nice when you chomp into them.  Consequently, the final product that you are left with after 6 weeks of fermentation is equally different from the slog in the jars you may be used to purchasing in the stores. It is still not something I go wild about, but for those who really like sauerkraut, home made stuff is to die for–apparently.

Finished, canned sauerkraut. I used red cabbage this year, hence the pinkish kraut.

Finished, canned sauerkraut. I used red and green cabbage this year, hence the pinkish kraut.

While I’m not a huge fan of the kraut in general, I am a big fan of the cabbage rolls made with fermented cabbage leaves in particular. In fact, I crave it. Because I only make sauerkraut once a year, I only get to enjoy the fermented cabbage leaf rolls once or twice per year as well. If you’ve never tried it, I encourage you to do so. It transforms an otherwise so-so meal into the culinary equivalent of high art. I should probably look into figuring out how to preserve those fermented leaves so I can have that more often. In the meantime, I’ll make do with the occasional ‘lazy’ cabbage rolls, layering the ingredients with my sauerkraut.

Sauerkraut Recipe:

You will need a very large crock, glass or enamel container
Minimum of 2 heads of cabbage
Kosher salt (I use pickling salt)
Heavy duty food-grade plastic bags or 2 gal freezer bags (unless you have a Harsch Crock)
Wooden spoon (or something to pound the kraut with)

Some tips here to prevent problems with your sauerkraut:

Never use aluminum utensils!
Absolute cleanliness is necessary for a healthy brew!
I have a very old 5 gallon crock that I use to make my sauerkraut and cover with plastic bags and a plate to keep air out. I also have two Harsch crocks that were specially designed for kraut making and have an airtight seal incorporated into the design. But you can use a glass or enamel coated container. Clean and scald the container well by pouring boiling water into the container and swishing around for no less than 30 seconds.

If you use a Harsch crock, follow the directions that come with the crock; it uses less salt that this recipe does.

To prepare the cabbage, remove and discard the outer leaves. Wash and drain, then cut the cabbages into halves or quarters while removing the core in the process.

Step 1) Shred Cabbage – I use my food processor for speed and ease. If you shred by hand, make sure the shreds are no thicker than a nickel or dime!

Step 2) Mix, with wooden spoon or very clean hands, 5 pounds of shredded cabbage with 4 tablespoons of Kosher salt (pickling salt will do but changes the flavor a bit – do not use table salt) and toss and mix thoroughly until kosher salt dissolves. (You can make as much as you wish as long as you use the ratio of 5 lbs. cabbage to 4 Tbs. salt.)

NOTE: If you plan on refrigerating and not canning, use 3 tbs of salt, not 4.

Step 3) When juice starts to form on cabbage from tossing, pack the cabbage firmly and evenly into a clean crock, glass or enamel container. Press firmly to encourage juice formation. Fill the utensil no closer than 5 inches from the top.

Step 4) Make sure juice covers the cabbage completely (this does not always happen unless the cabbage is fresh from the garden). Prepare additional brine by putting 1 1/2 Tablespoons of kosher salt into 1 quart of boiling water. Dissolve salt and cool brine to room temperature, before adding to the pot of cabbage.

Step 5) Once cabbage is immersed in brine water, place a large food-grade, plastic bag filled with brine water and lay it on top of the cabbage. (I use 2 large bags, one inside the other–sometimes a 2 gal freezer bag–with a couple of quarts of cooled brine water inside. If the bag breaks, it will not water down the cabbage into a tasteless mess.)

The cabbage must be well sealed all around with the bag, so no air can get in and contaminate the sauerkraut with unwanted yeasts or molds.

Step 6) Now cover the container with plastic wrap, then a heavy towel or cloth, and tie securely into place. Do not remove this until fermenting is complete.

Step 7) Put in an area where the temperature will not be above 75 degrees. Fermentation will begin within a day, depending upon the room temperature. If room temperature is 75 degrees, allow 3 weeks for fermentation. If temperature is 70 degrees, allow 4 weeks. If temperature is 65 degrees, allow 5 weeks. If temperature is 60 degrees, allow 6 weeks.

NOTE: If temperature is above 75 or 76 degrees, the sauerkraut may not ferment and could spoil!

Step 9) Once fermented, taste to see if your required tartness exists. Tartness will weaken as you process in canning, so make sure it is a wee bit more tart than you like!

Can be eaten immediately, or can it if you desire.

CANNING METHOD:

Hot Pack:    Pint jars………..10 minutes Quart jars……..15 minutes

Raw Pack:   Pint jars………20 minutes Quart jars…….25 minutes

I have tried both, and prefer to use the cold pack–it makes a crisper sauerkraut.

17 Comments

Filed under Fermented foods, Food Security, Preserving the harvest, Vegetable gardening

You asked for it: more garden photos.

Early morning on the farm.

I’ve had some people email and ask for more garden photos, so here goes. As it happens, I did take some nice photos of the garden yesterday. To quote one person, ‘so us city-folk can live vicariously’. How about video? was the next question. For now, that will have to wait.

Mama’s little helpers:

It is now time for the final harvesting and turning the chickens in to help with the clean-up. The plants are established enough that the chickens can’t really hurt them. This is certainly not the case all season: you have to pick your time.

Chickens love to help at weeding time.
Not just a pretty face, he's hard at work.
Not just a pretty face, he’s hard at work.

Overachievers anonymous:

The over-achiever red mustard lettuce.

Feeble attempts of creativity:

Here is my artistic attempt at photo taking which I learned from my friend, Rebecca Wellman, who is a professional photographer.  Check out her site if you want to see real talent:

http://rwellmanphotography.wordpress.com.

As for my attempts, don’t blame her for my lack of talent–I’ve worked hard to call that my own.

Where's my shovel?
Where’s my shovel?

The pre-harvest cabbage.
Soon to be a salad ingredient...
Soon to be a salad ingredient…
The volunteer.
The volunteer.

That’s all for now!

3 Comments

Filed under Chickens, Sustainable Farming, Vegetable gardening